

We all know that fermented food is good for us but did you know it’s good for your chickens too? Here’s how it is good for your chickens and a rundown on how we ferment grain for our flock.
They can benefit in several ways from fermented food. We feed our chook scraps of the same fermented foods that we eat, things like Sauerkraut and Kimchi, they love squabbling over chunks of Kombucha scoby and Apple Cider Vinegar mother and we periodically add Apple Cider Vinegar to their drinking water. They also love eating Bokashi vegetable scraps straight from the Bokashi bin!
The main way that we keep our flock’s gut biomes happy is through fermenting their grain. This simple, easy to do technique has many benefits which include more moisture in their diet, increases fibre, vitamins and minerals as well as microbes introduced from the ferment Fermenting your chicken’s grain also reduces the Phytic Acid in the seeds which actually impairs the absorption of iron, zinc, calcium and some other minerals. Its presence is why we must cook, or at least soak, so many types of grain before we can eat them and is why Phytic Acid is called an ‘anti-nutritive’ factor.

How to ferment your grain
Fermenting grain is so easy that, after reading this, you’ll be wondering why you never did for your chooks it before.
What you’ll need.
- Grain
- Water
- A container with a tight fitting lid
- (Optional) liquid from another ferment such as Kombucha
- (Optional) Molasses
- (Optional) Shellgrit
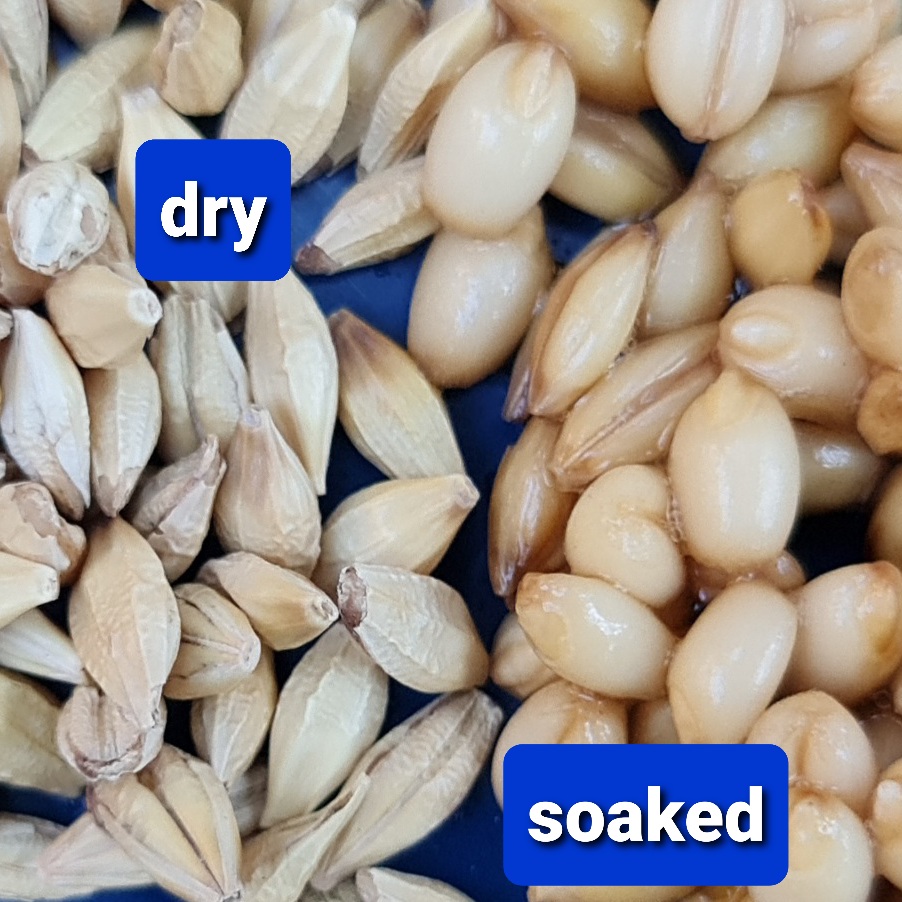
All you need to do is to put the grain in water, make sure that it is well submerged. For grains like Wheat and Barley, make sure that you’ve got roughly twice the volume of water to grain because they’ll absorb lots of water.
Seal the lid on the container and leave it for three days or so in the warm weather (longer, of course, in the cold) if you see bubbles on the surface, you know that the ferment is working.
If you want to speed things up a little, add some liquid from another ferment to your bucket. Maybe you have some leftovers from a previous bucket of fermented grain, some Kefir, Kombucha, Sauerkraut, Apple Cider Vinegar – anything fermented from your kitchen can go in. You can add some Molasses too as that will feed the microbes in the ferment and make them multiply faster and work harder.
I like to add a handful of shellgrit to each bucket. The fermentation process will break it down a little and add some calcium to the liquid. It also acts as a buffer to stop the ferment from becoming too acidic too quickly. When I give the girls a scoop, it has extra calcium in it already and that’s good for the girls.
One bonus that gets added to the ferment when I can afford it is granulated kelp. This adds a massive mineral and micronutrient boost to the mix that benefits both the the microbes doing the work and the chickens that get eat the final product.


What to expect
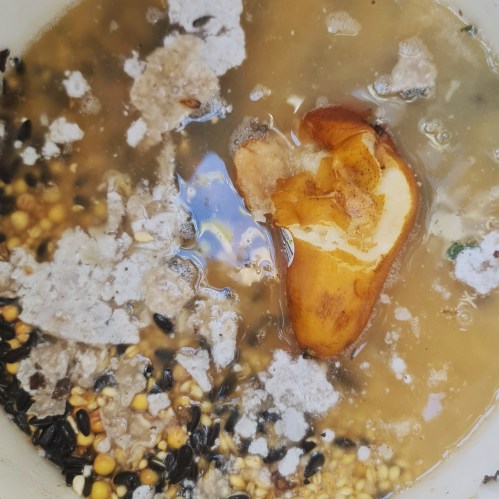
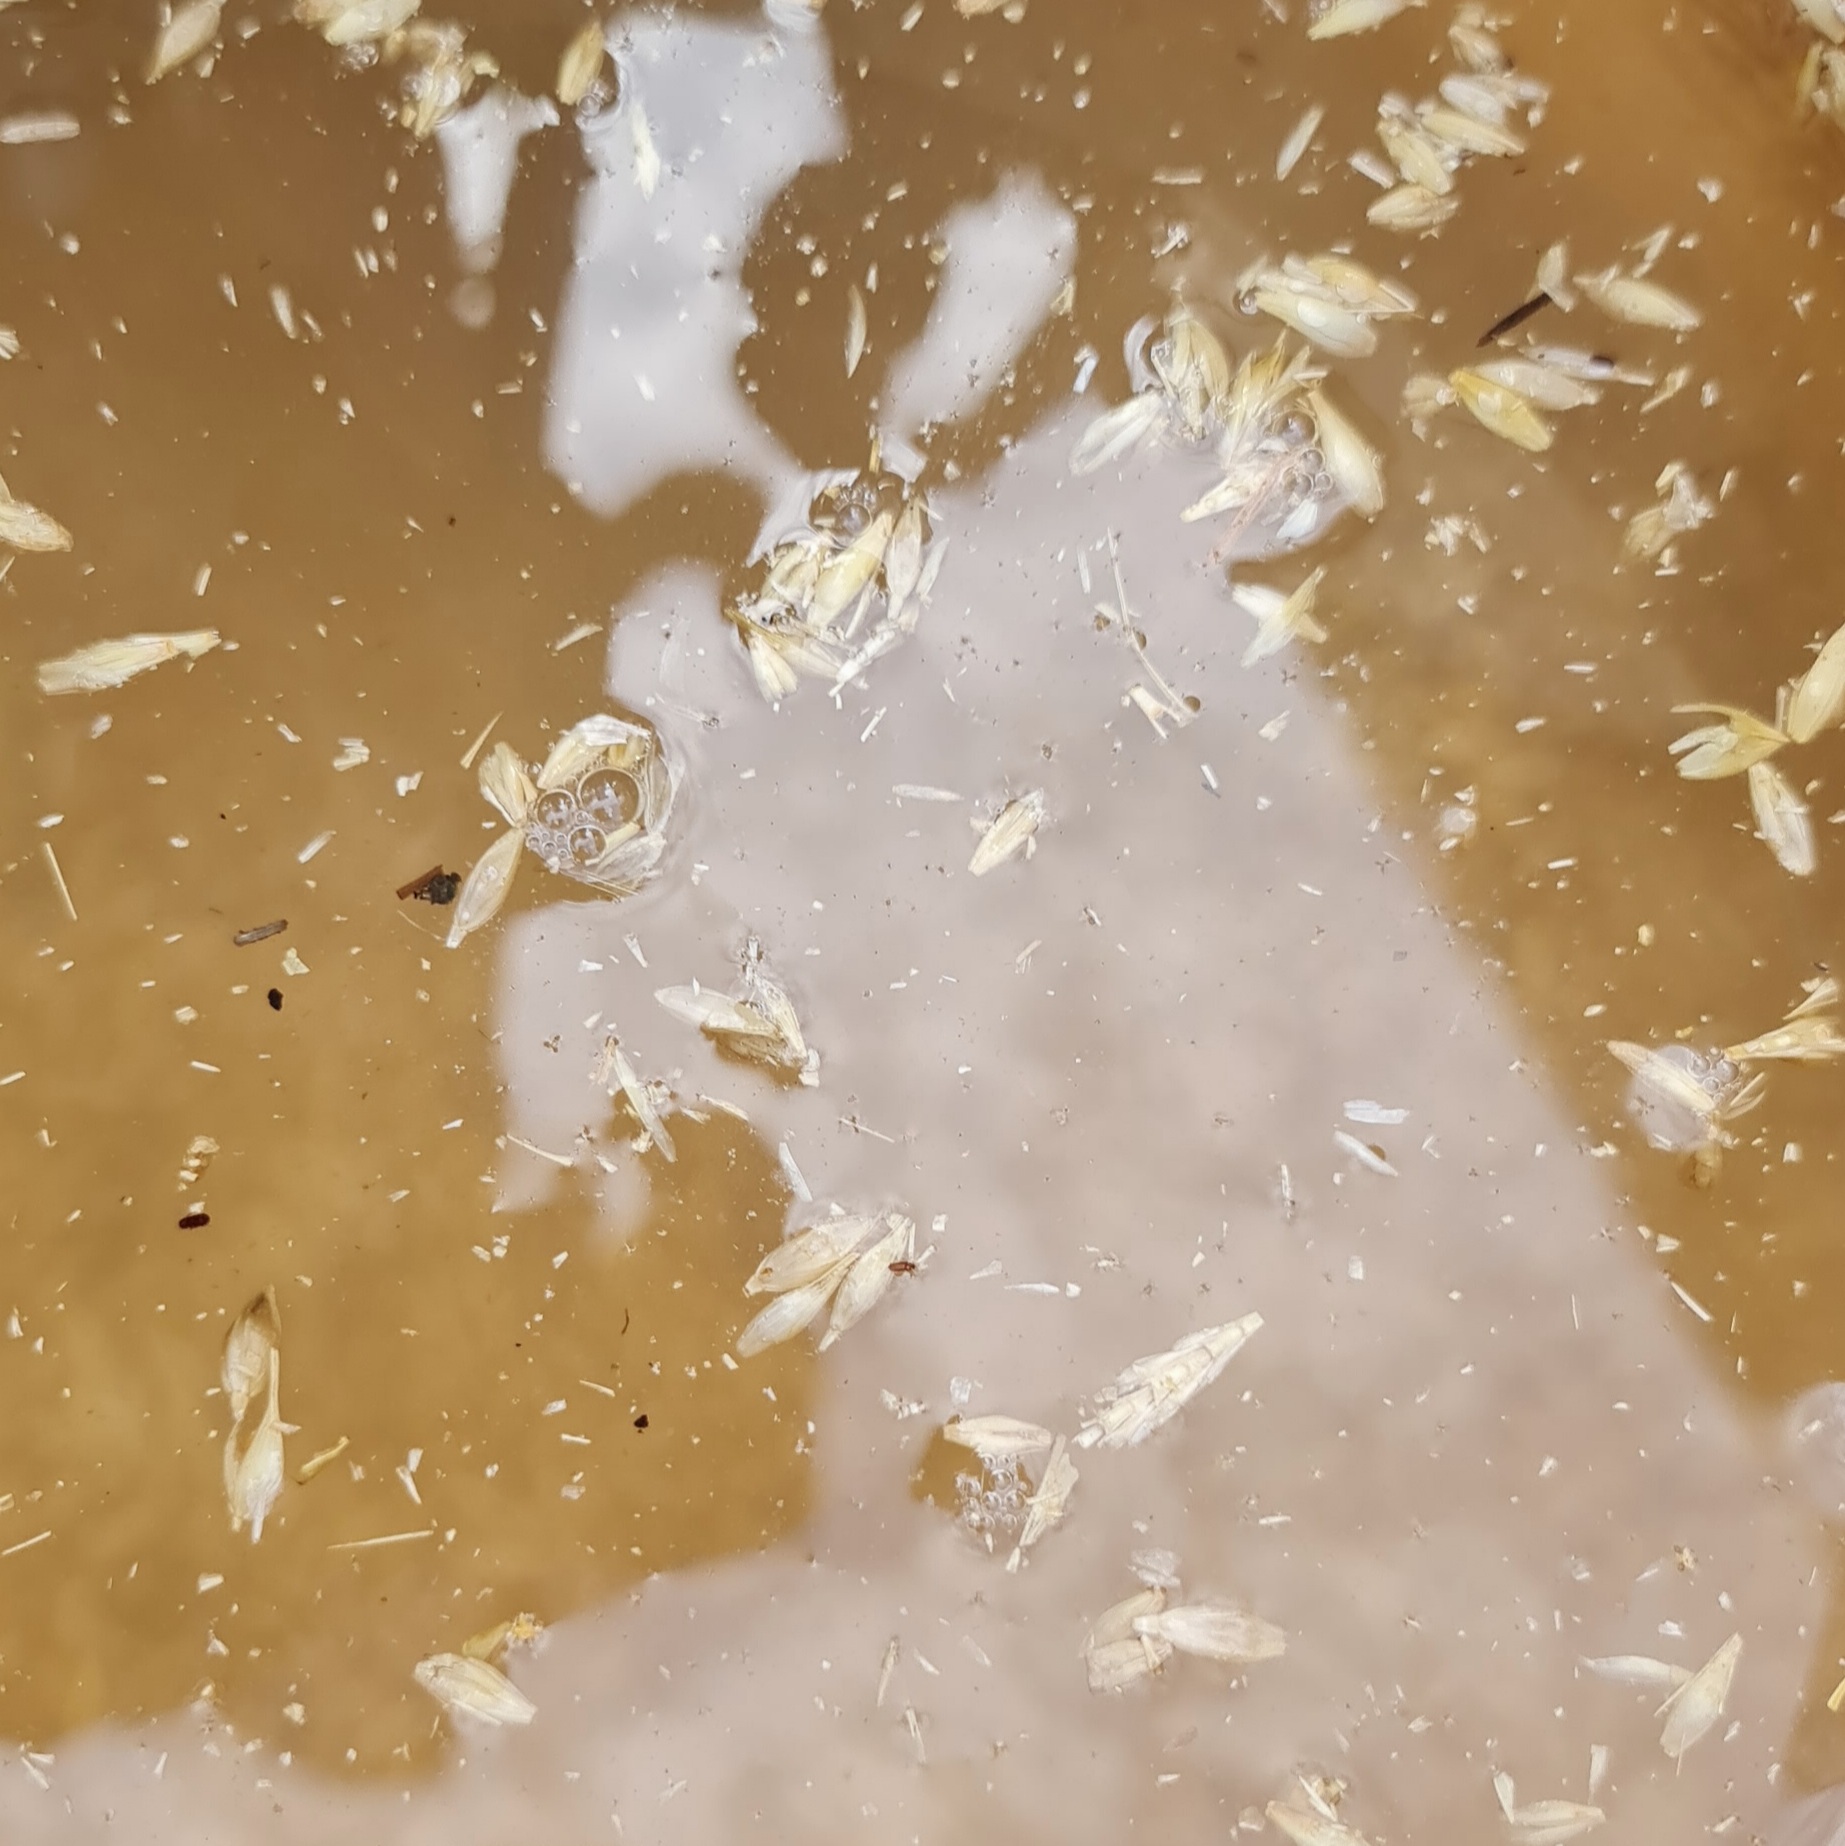
Your grain will swell a lot as it absorbs water. After 2 -3 days, depending on the weather, you will notice some bubbles forming on the surface of the water, especially if you stir the grains a little. This is CO2 that is formed as a waste product of the microbes going about their business and is exactly what you want to see. Give it another day or so for the microbes to really get busy and then you can feed it to your chickens.
You may notice a grey/white film or scum forming on the water’s surface. This is called Kahm yeast and is not an issue, it’s harmless to your chickens and


Cautions
As with anything, don’t overdo the fermented foods. Everything in moderation, of course. Fermented food is acidic and too much acidic food, especially when it’s loaded with yeasts and other microbes can lead to an ailment known as Sour Crop in your chickens.
Possible problems
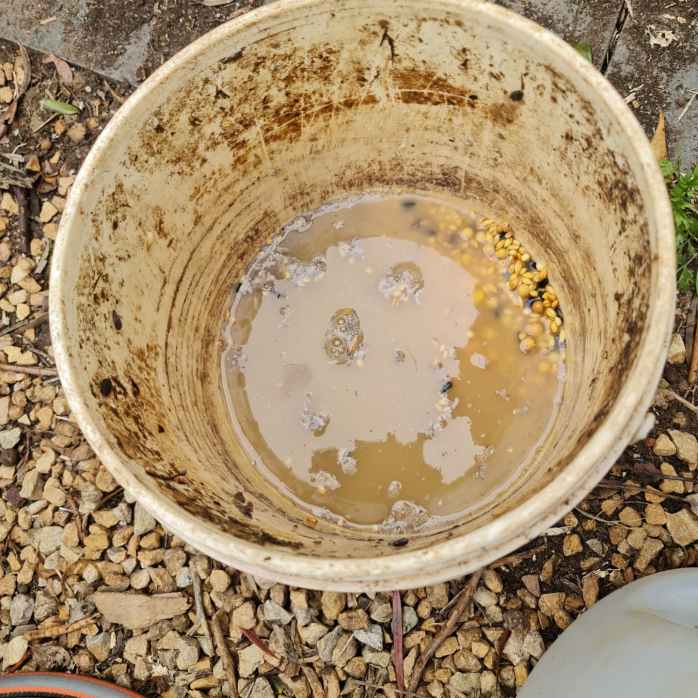
There aren’t many things that can go wrong with fermenting grain. it’s the same as when you ferment your own food, not keeping the food submerged below the surface of the water. If the water level falls below the top of the grain, you are exposing it to oxygen.
- White mold. White, Cotton Mold can form on any grain surface that is exposed to air.A little white mold isn’t a really bad thing, just submerge the grain thoroughly and it will die off.
- Green mold. This is a bad thing and is a sign that you’ve neglected your ferment for waaaayyyy too long and the little ecosystem that forms in the bucket has got out of control. You’ll have to dispose of this batch. Fortunately, worms will break it down and eat it eventually, so add it to your worm farm or bury it in your garden and start your ferment again.
- Sprouting can occur in grains that are above the water surface because sprouting is triggered by the presence of both oxygen and moisture. This isn’t a big issue, just feed the sprouted grains to your girls and they’ll love you anyway. Top up your container with water to submerge the rest of the grain.
- Vinegar Flies. These aren’t a problem in small numbers, they are attracted by the CO2 coming from the daily activities of the microbes in the ferment. A well fitting lid on your bucket is the answer here.
- Scum. A grey scum on the surface of the water is Kahm Yeast and isn’t a problem, though it is visualkly unappealing. If it bothers you, skin it off or lay a piece of cheesecloth over the surface of the water to help lift it away.
- Discoloured or cloudy water. Unless it smells stagnant, this isn’t a problem, ferments often cloud the liquid they are in. The water should turn cloudy and possibly yellow or brown or grey, depending on which grains you are fermenting. It shouldn’t smell, though, beyond a fermented, vinegary smell.
- Bad smells. Your ferment should smell like…fermentation. That delicious, slightly acidic, vinegary, smell that makes you tingle down to your toes if you’re a fermentation lover or slightly acidic ‘off’ smell if you’re not. If it smells really rotten or even light rotten eggs, discard the batch and start again. Bad smells can happen if the ferment has got too hot and the heat has killed off the good microbes in the mix and they’ve, basically, rotted along with the grain.


Using the dregs or lees
After a while, the contents of the bucket become a bit stinky even for my tastes but they’re gold around the garden. The lovely microbe rich liquid that’s stinks up the place is a super food for the soil so doesn’t go to waste.
How to use the liquid
When I’ve nearly emptied a bucket of fermented grain, I add about a cupful of the leftover liquid to each watering can full of rain water and distribute it around the garden, especially to the pot plants as potting mix is often short on microbial life. The brew is full of anaerobic bacteria and yeasts and all the good stuff that has come from their digestion of the carbohydrates in the grain, plus whatever other goodies that I added to the mix when I started it. It’s a little acidic too and that’s good because our garden has become a little alkaline over the years. It’s literally, liquid gold
When it’s watered down and poured out onto the garden, the microbes will either find their own places in the soil or die and become a food source for other critters. I leave a couple of cupfuls of already fermented grain and a little of the liquid in the bucket to kick start the next batch too.

Here’s a tip!
If your ferment is getting a bit weak or you really want to kick off a new batch, add a piece of sugar rich fruit to the mix snd watch it go!