


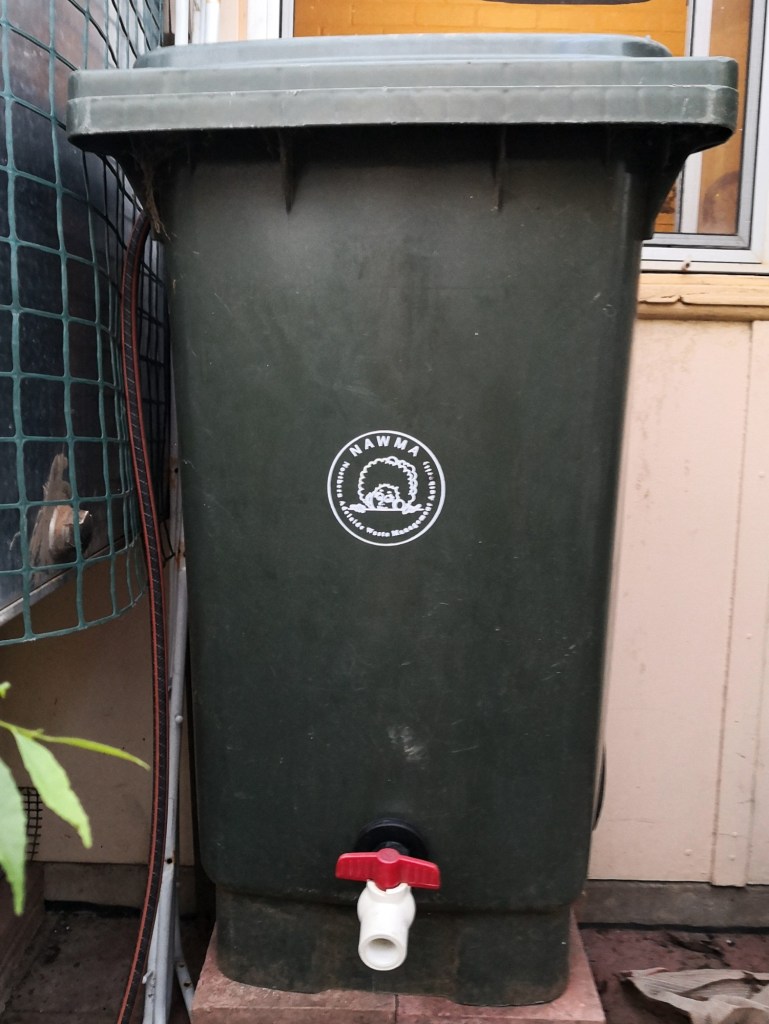
In this DIY project, I’ll show you how to convert one to a rain tank. They’re an economical way to do this, a 100 litre tank from a local hardware chain costs $80, while you can get one these for around the same price or less.
The additional parts cost about $25 from our local Mitre 10 hardware store and are dead easy to add to the bin, giving you a covered, mobile rain tank (though I wouldn’t try using one when its full of water. 240 litres weighs 240 kilograms!

Make sure you have the right tools. They’re listed below

The only fittings you’ll need. They’re listed below.
The tools you’ll need –
hacksaw
drill
thread tape
grips
pipe wrench
sandpaper
25 mm spade bit
22 mm spade bit
small spade bit to fit the incoming hose
The fittings you’ll need –
20 mm PVC valve
22 mm top hat grommet
20 mm tank fitting
hose
How to put it all together
Mark a spot where you’ll drill the hole for the tank fitting. Make sure you have enough space between the mark and the bottom of the bin for the fitting to sit clear of the bottom. Some bins have a curved bottom too, so you’ll have to adjust for that.
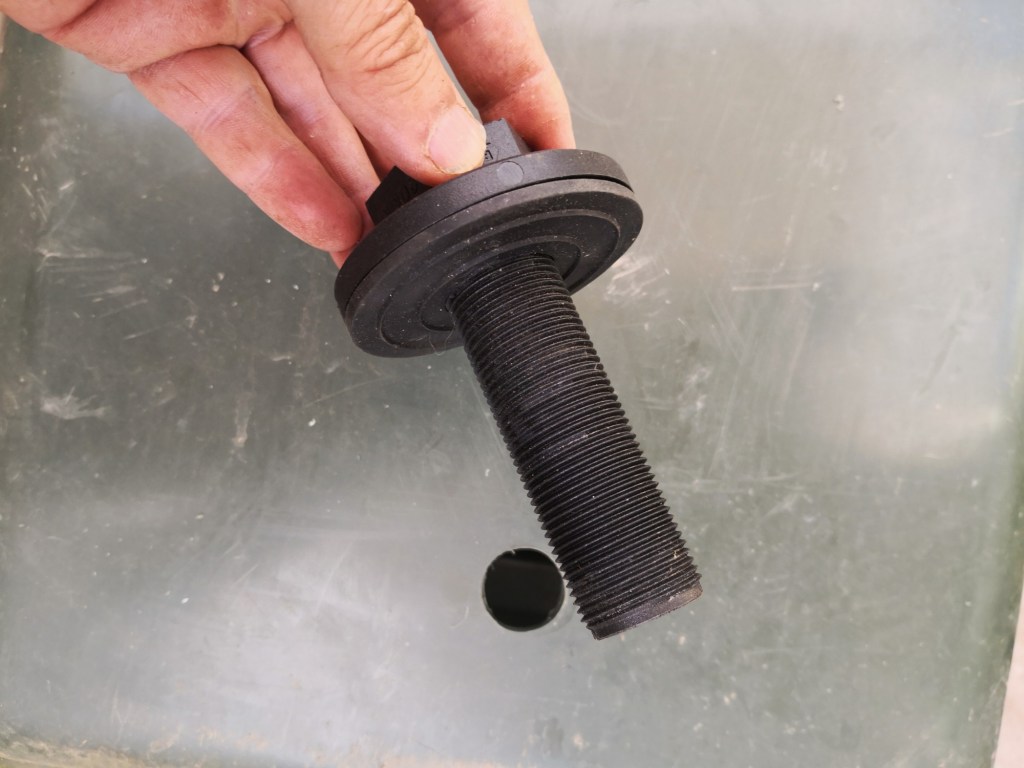
Drill the hole with the spade bit. I’m using a 20 mm fitting, so need a 25 mm spade bit.

You may have to widen the hole a little with the sandpaper or a knife.

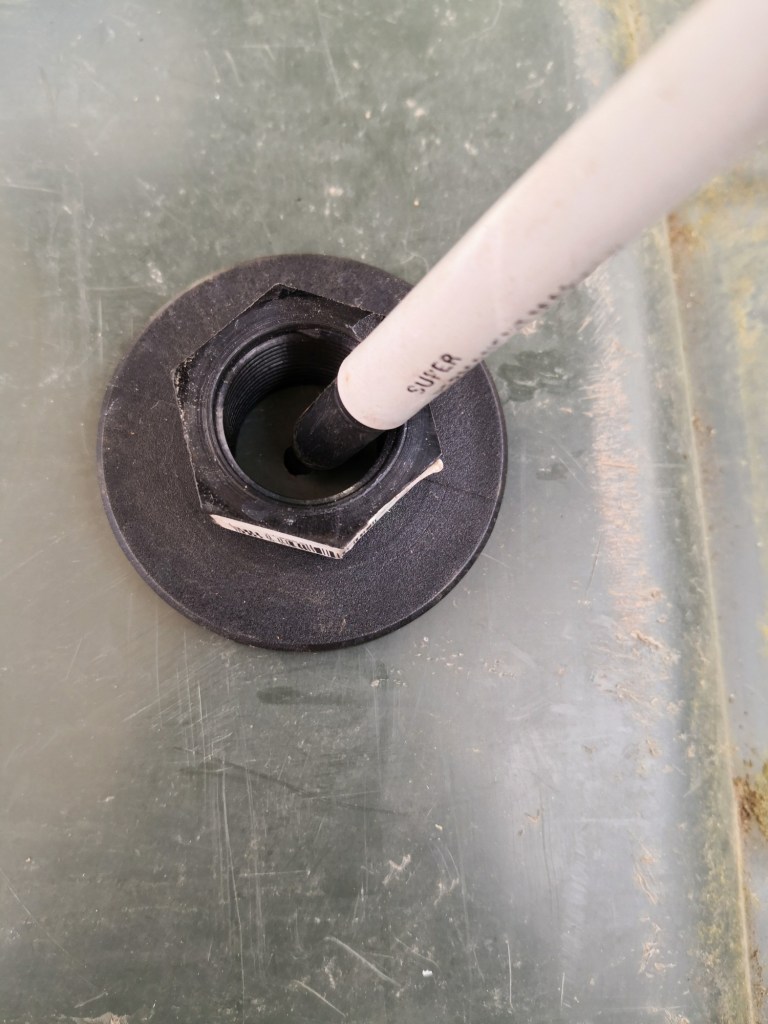
Insert the fitting through the hole so that the longest part of the thread is on the outside of the bin.


Use a pipe wrench or pliers on either side of the fitting to get a good, tight fit.

Measure the amount of thread needed to fit the valve.

Cut the appropriate length off of the thread, leaving the amount you need to thread the valve on. This isn’t necessary but will give a nicer looking result. Sand the rough edge before attaching the valve.

Add thread tape if you want and screw on the valve.
Before you continue, you’ll have to decide where the inlet will be and on which side your overflow outlet is going to go.


Drill a 22 mm hole for the overflow and slip in the top hat grommet
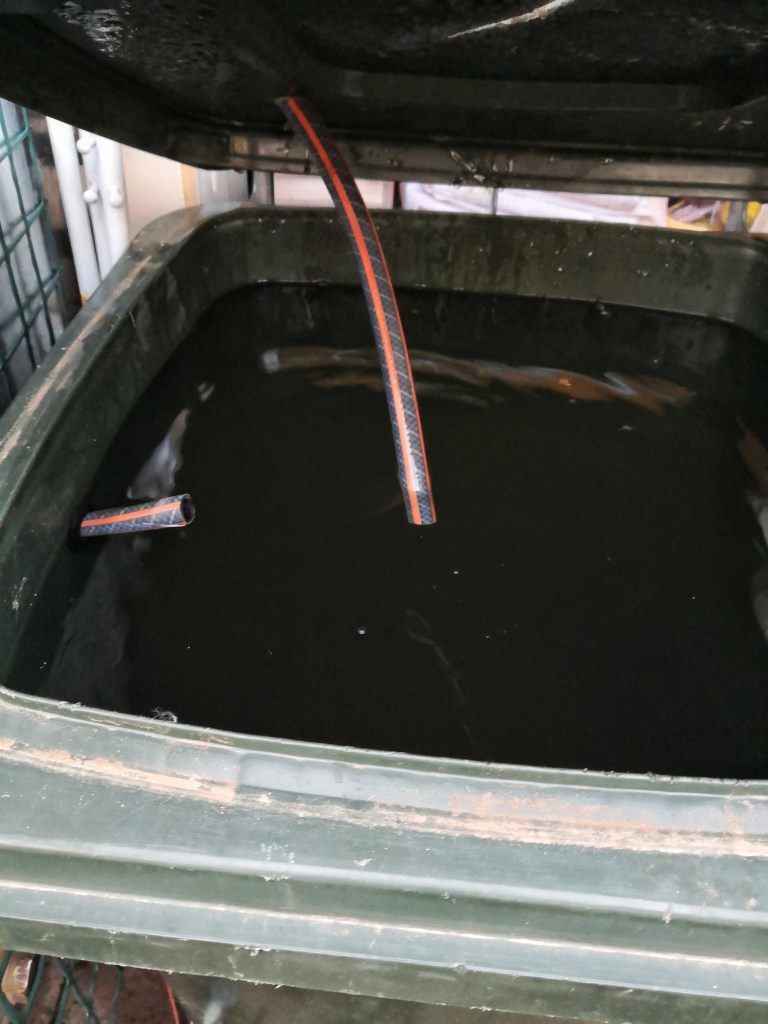
Make a hole in the lid just wider than the hose that will bring the water. Thread the hose into this. I usually silicon this but you can use another top hat grommet if you want.
Slide the overflow hose through the overflow grommet and away you go.
There you go, you now have a covered, portable rain tank for around a hundred bucks.
There are more easy to make ideas and how-to’s on our Low Technology page.
