At Ligaya Garden, we have a drip irrigation system in place that runs primarily from mains water but can easily be switched to the two rainwater tanks in the front garden. That gives us 1800 litres to play with if the mains is cut off. These tanks are connected to the tanks at the back of the house too so that, if the front tanks runs dry, we can use them instead.
Drip irrigation is my favourite method of watering the garden. Beside the fact that one can spend forever playing with slight changes and adjustments (I call it ‘gardening Lego’), it is a really efficient way to water our our perennial garden and, once set up, watering is no harder than turning on a tap or remembering to change the batteries in the timer.
Drip irrigation is a very simple thing that can be as much fun to tweak an as it can be to create a new system. I’m always on the lookout for ways to make ours just that little bit more efficient. It’s a bit of an obsession really. What I find amazing is how little you need to turn on a tap to get even a big system going. On ours, neither tap gets turned on more than a quarter of a turn. I’ve measured it with a flow meter and each system uses less than 5 litres per minute to water the whole garden. That low flow rate also means that the system is just as happy running, gravity fed, from raintanks. I leave our drippers on for an hour.
Components of a drip system
Drip irrigation generally runs from either black polypipe or from brown poly with emitters already set in it at particular spaces. the usual gardening sizes are 4 mm, 13 mm. 19 mm, 25 mm. For now, we will talk only about the most common two sizes – 13 and 19 mm.
Pipe
The black, polypipe comes in 25 or 50 metre rolls for 13, 19 and 25 mm pipe. Of course, you can buy it in much longer lengths from specialist irrigation centres but these are the usual sizes that you will buy from a hardware store or garden centre.
The pipe connects to another hose or a tap via special fittings.
Once you have the pipe, there are lots of options for configuring it just the way you want it. Usually, it will be cut into straight lengths, some of which will be joined at angles or to make loops. Most of the items listed below are ‘barbed’ that means that where the piece slips into the pipe, there is a barb that the pipe squeezes over, ensuring a tight fit.
There is also the brown, 13 mm pipe that has drippers (emitters) already installed internally. There is a hole with an emitter every 30 cm. You simply lay this pipe along where you want to water and plant accordingly. It uses all of the standard 13 mm attachments and joiners.
If you include this brown pipe in a system using the black poly, I recommend adding an inline tap where it joins the main system. This will allow you to tweak the pressure and keep the flow to the appropriate pressure. I think the flow rate of the emitter is 3 lph.
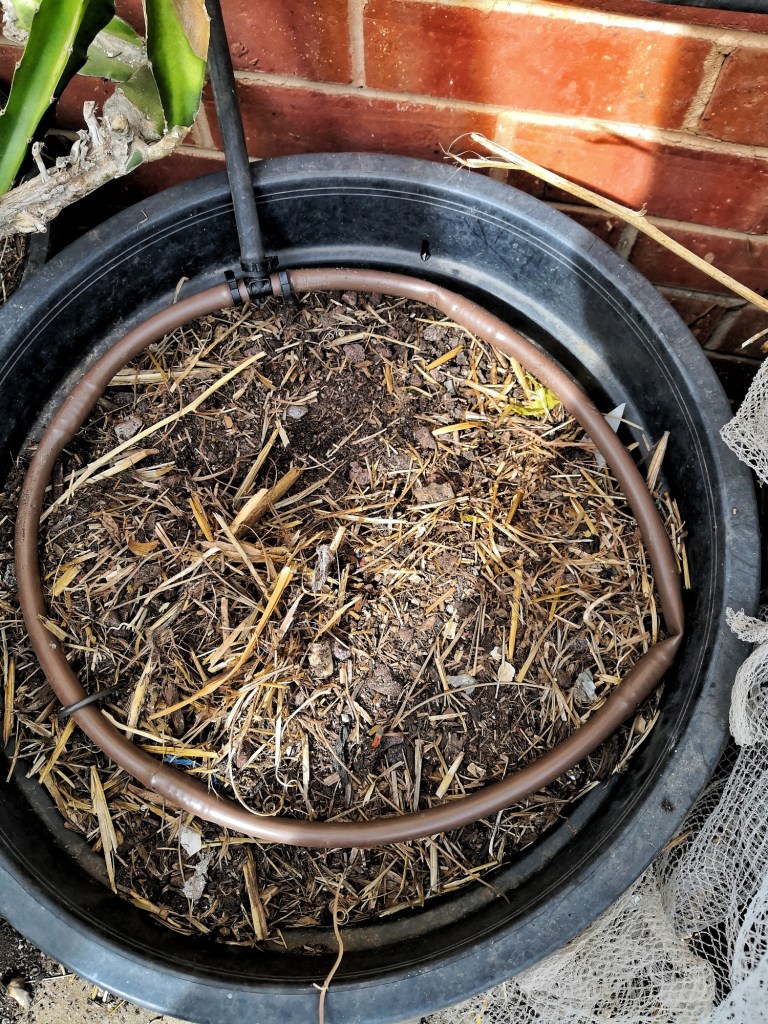
I like to make loops of this brown pipe to run around the inside edge of large pots. 4 emitters per pot on a string of pots means that I can water the pots in under 10 minutes with no more effort than just turning on the tap a touch. By making the loop a centimetre or so smaller in diameter than the diameter of the pot, I escape having the water simply run down the inside of the pot wall.
Tap and hose connectors
You can connect the polypipe to a hose or standard tap with the appropriate fitting. For the tap fitting, one part screws snugly on to the tap and the other end fits into the pipe with a barbed joiner. The other option is a click on connector that will click on to any existing hose connector.
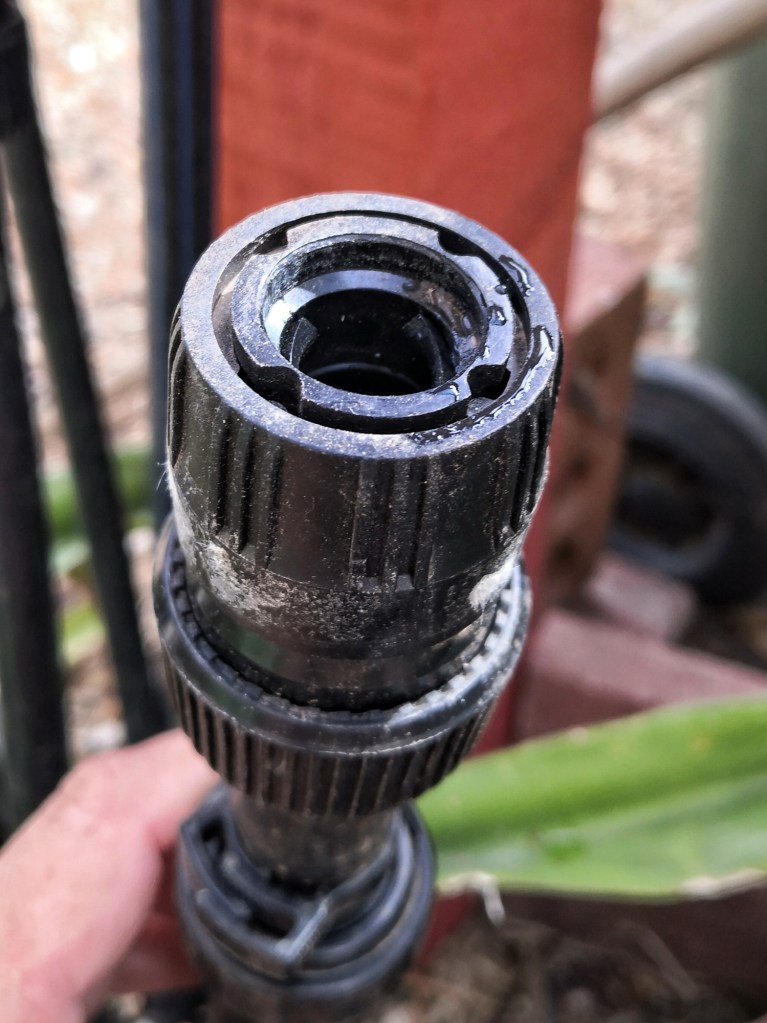
I recommend fitting a ratchet clip at the place where the tap or hose connector joins the pipe because it is the first one on the line and the most subject to accidental bursts of high pressure (like when you crank the tap on, forgetting that it is a low pressure system – POP! Instant shower!).
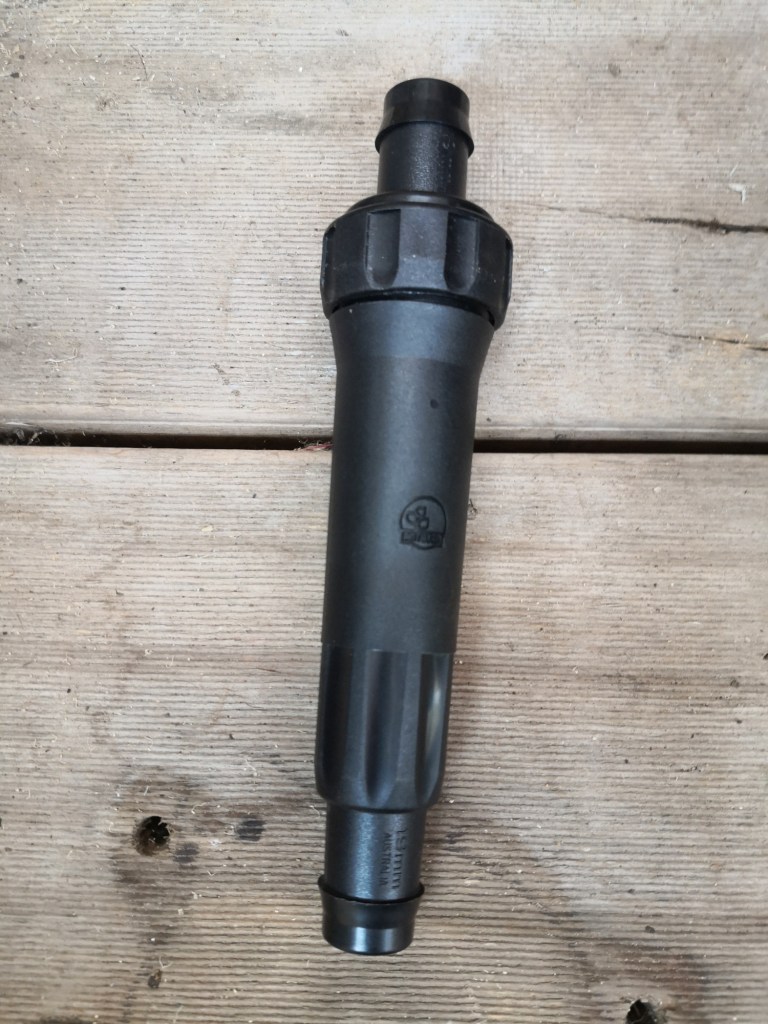
Drippers
Drippers are the what its all about. They reduce the flow rate of the water in the pipe and let it drip out. They are usually rated as litres per hour (lph) at 100 kPa (kilo Pascals of water pressure (where that is on a garden tap, I don’t know) but they may be in pounds per square inch in some countries). Common rates are 2, 4 and 8 litres per hour.
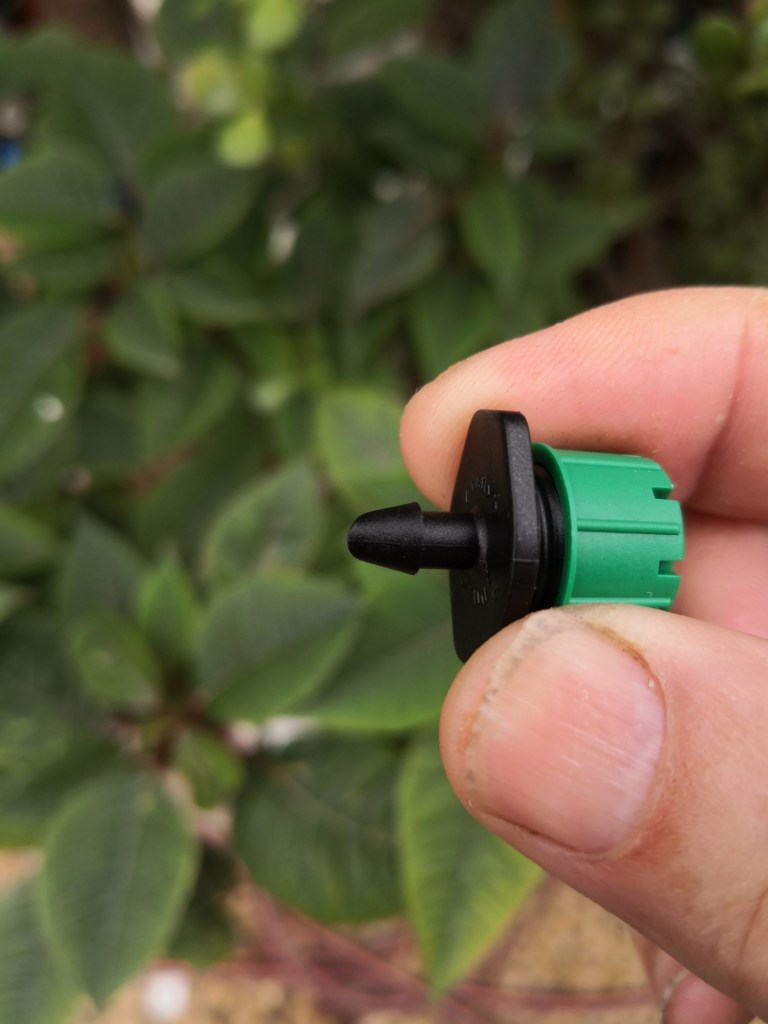
I favour adjustable drippers that flow at 0 – 50 lph. Adjustable are better in my books because, beside adjusting the flow according to the season and customizing it to a plant, you can close off individual drippers without removing them should (heaven forbid) a plant dies.
Drippers are put into of the polypipe in two ways. There is a punch available that punches the right sized hole through the wall of the pipe. Then there are two styles of connection – a barbed one that you just press into the hole until it snaps in or a screw one that you screw into the hole until the dripper is snug against the pipe. I prefer the screw fittings because if you have to remove them, they leave a smaller and tidier hole than the barbed versions which can distort the hole quite a bit as you pull them out.
You can get ‘easy clean drippers’ too that you can take apart to clean out. There’s a paragraph on maintenance later where I’ll go into more detail on that.
Shrubbers

Shrubbers are little, adjustable, sprinklers that plug straight into your polypipe.
In our system, they deliver water to a wider area than drippers when under mains pressure and act as drippers when the system is run off of the raintanks.
I’ve got them in areas where self seeded annuals often pop up, being more efficient than covering the areas with multiple drippers.
We have also positioned a few so that they make corridors of moist soil between the in- gound worm refuges so that microbes, worms and other critters can still move around during the hot weather.

Joiners
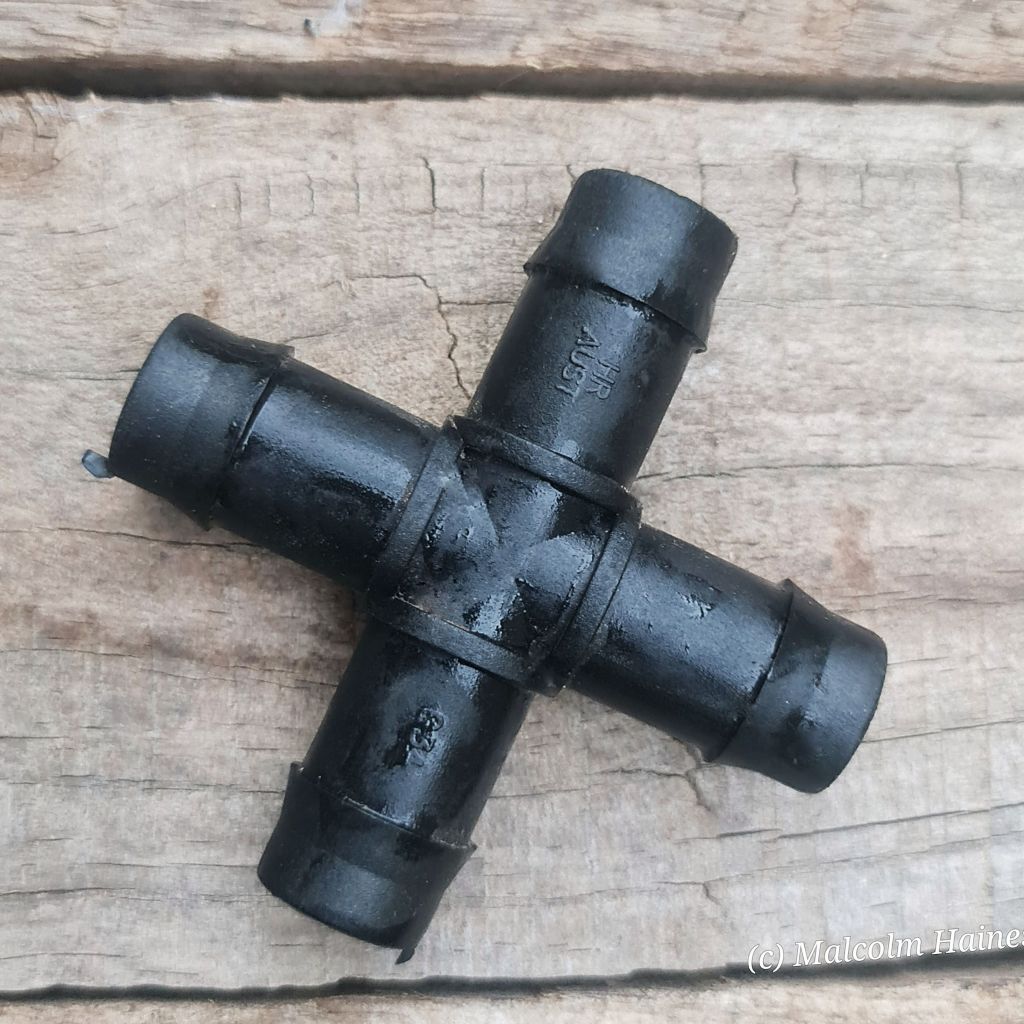
Joiners come in a few varieties. There are straight joiners for joining 2 lengths of pipe together. There’s T pieces for joining 2 pieces at right angles to another. Then there’s cross pieces for joining 4 pieces to a central point.

Filters
Filters are a must and they come is different sizes but all do the same job – keeping debris out of the pipes.
Flow meter
A flow meter is a handy tool that will let you see how much your irrigation efforts are saving you!

Pressure reduction valves
Pressure reduction valves are handy if you have very high water pressure. They are designed to let a certain pressure of water flow and vent any extra through a hole in their side. The usual pressures that you can buy are 100, 200 and 300 kPa (kilo Pascals). Most drippers are rated as flow rate (litres per hour) at a certain kPa. The ones I use are 0=50 lph at 100 kPa. This means that, if you’re flow rate over your whole system is too high, you can reduce it to half with a 200 kPa reducer, a 300 kPa reducer will reduce it to a third.

Taps (valves)
Inline taps are available for giving finer control to the flow rate in each section of your system. Where a pressure reducer will reduce the flow to a whole system, a tap can help you tweak a section.
I’ve added an inline tap to each corner of the system so that I can flush sediment and debris out of it after winter.b

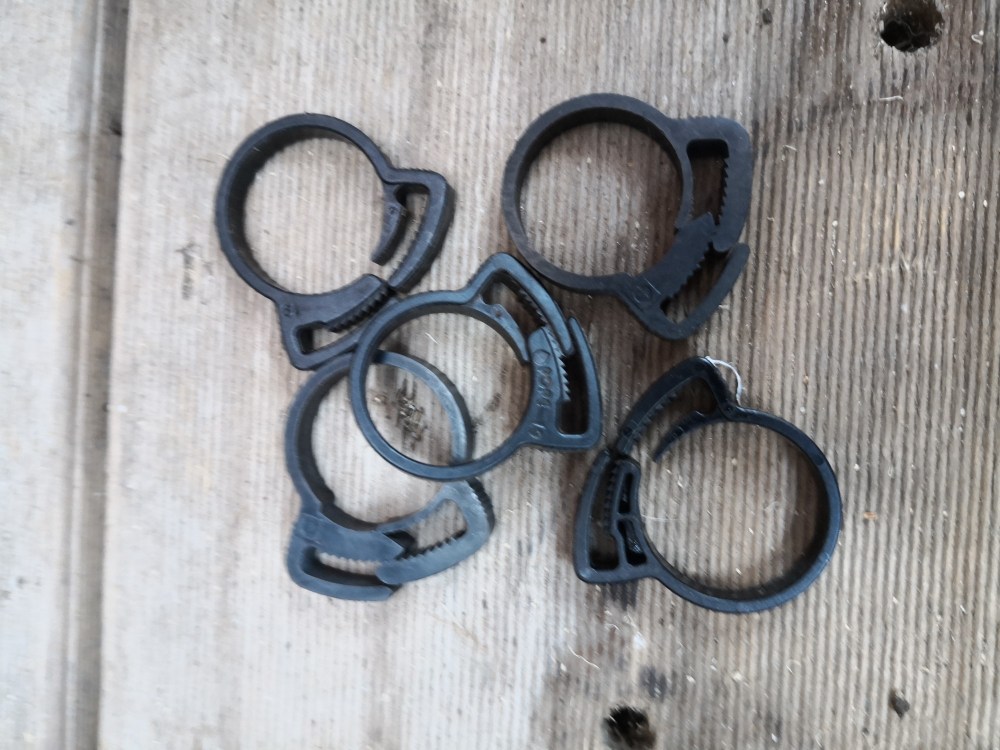
Ratchet clips
These are essential on higher pressure systems or those that are in full Sun. Polypipe is plastic and gets soft in the heat, allowing the hose to pop off of a joiner when under pressure. Toothed, plastic clips fit around the pipe after the barbed section of the joiner to hold the pipe and joiner tight. They work on a ratchet, so as you press them together, you will hear the ratchet click as the teeth click together.
On very low pressure systems and systems that aren’t exposed to extremes of temperatures, ratchet clips are not a necessity. They are, though, on all other systems in order to to prevent ‘blow-outs’ which happen when the pipe works it’s way off of the joiner and pops off under pressure, resulting in quite a mess and a lot of wasted water.
End stops
End stops for when you reach the end of the line. Unless you are making loops or squares, one of these squeezes into the pipe at one end. A clip will hold it tight and make sure it doesn’t pop out under pressure.

Size adapters
Size adapters are available to adapt between the three common sizes of polypipe and fittings, I have a couple of 19 mm to 13 mm adapters in our system. I use t-pieces that fit the 19 mm with the third ‘leg’ being 13 mm. You can also get straight adaptors that allow you to change the diameter of your pipe in a straight run.

Goof plugs
Goof Plugs. Everyone makes mistakes or changes their minds or both. When you remove a dripper or some adapters, they leave a hole in the pipe. Squeeze in a goof plug into it and you’re as good as new. Trust me, Goof Plugs will be your best friend!


If you’re finding this information useful, share it with your community
Tips
Hot water
Hot water is a must of you’re doing more than a couple of pieces. Submerging the end of the pipe to be joined in hot water softens it and makes the whole process much easier. It also makes joiners easier to remove.
Plan ahead
While this is all great fun to install, change around and tweak, these systems can become rather expensive. I suggest drawing your planned system on paper several times before hitting the hardware store, Each individual component is quite cheap and will last forever but mistakes resulting in the purchase of unnecessary pieces can add up. Plan well and think ahead. I do recommend, though, buying a couple of extra t-pieces and 90 degree corners at the start. Having a couple of each of these spare means that you can easily and quickly adapt that section that you didn’t quite get right the first time.
Clips
Sometimes clips will get stressed, knocked about or otherwise damaged. They can get brittle after years in the Sun. It pays to check visually check them. If you don’t and your system has high water pressure, the pipe could pop off a joiner and waste a lot of water.
Filters
Filters simply unscrew at the top. Then you can slide out the plastic mesh insert and give it a rinse. Filters positioned where a system joins mains water rarely need cleaning but those in between sections on the ground can pick up a lot of debris (especially if you keep forgetting and burying them under mulch like I do) and should be checked quarterly.
Clogged drippers
Drippers can be taken apart and cleaned. There are ‘easy clean’ versions of most sizes with a top that screws off for a rinse. Other varieties let you screw off the top but there is a solid or perforated rubber or plastic disc inside them that you must be careful not to lose (that’s the bit that regulates the water flow). This just pops out of the dripper and you can give it a quick rinse.
The most common cause of debris in the system is a simple one. Because the drippers are usually on the ground, they get covered in dirt, mulch or compost. Tiny pieces of sediment block the holes and can work their way inside and into the pipe. To unblock the holes, you can give the dripper a rinse with a little water, blow the dirt through or give it a hefty suck. All those techniques work well.
If you have an off the ground system, you’ll rarely have this problem.
Pressure compensation & balancing
Often when you’re putting in a system, you may find that one section just doesn’t get as much, if any water. Some may get an air lock in them too (you can tell an air lock if you go to a dripper on the affected length of hose and unscrew the head a little. you will hear air come out of the pipe and hopefully water will appear shortly after.
If you have a section that’s not receiving any water (and you don’t have it closed off by an inline tap) there are three things you can do. First, try turning up the tap pressure. You could find that a small tweak is all it needs. Failing that, join part of that section to another section that has water. This could balance it out. The third option is to loop the furthest point of your system back to near the the start. This enables water to flow through the system is two directions and will usually balance out any flow problems.
Getting water deeper into the soil
To get good soil penetration, place the dripper so that it drips into a piece of pipe sunk into the ground.

Positioning drippers in difficult locations
Sometimes the main pipe isn’t close enough for a dripper to reach a plant, especially if you’re like me and keep adding plants after you’ve installed the dripper system. Placing the dripper on a length of 4 mm pipe with a connector going into the pipe can give you the flexibility you need without redoing whole sections.
Doing this will also allow you to move the dripper from time to time around the area above the roots of bigger plants, This will help roots develop more evenly around the plant.
I stopped doing this because every time I let the chooks out for a scratch around, they’d knock them off. That meant that every time we wanted to turn the irrigation on, I’d have to find the pieces they’d knocked off and reattach them.