


Buying grain is one of the few ongoing expenses for Ligaya Garden. Of course, that excludes utility bills and petrol and the like. We don’t mind paying for grain so much, it’s important for the health and happiness of the chickens but we have found several ways to cut down on the amount that we have to buy and, hopefully make our girls happier and healthier with a more varied diet.
We have four main solutions to reducing the amount of grain our girls eat – sprouting grains, fermenting the grains, importing feeding the girls veggie scraps and fodder. I think that fodder is going to be the main contributor to quality and quantity in their diet. Fodder can be grown for any animal that likes to eat greens and can be grown for your rabbits, Guinea pigs, pigs, goats, sheep…whatever you have that will eat the stuff!
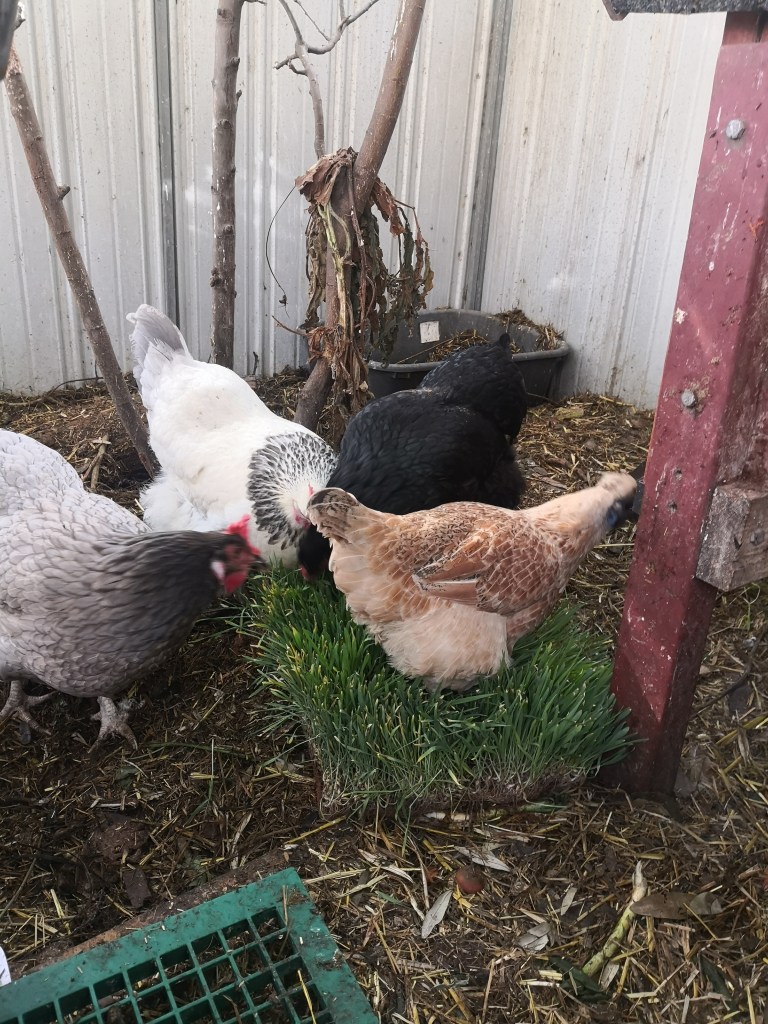
They girls love their fodder 
but are pretty fussy, they like 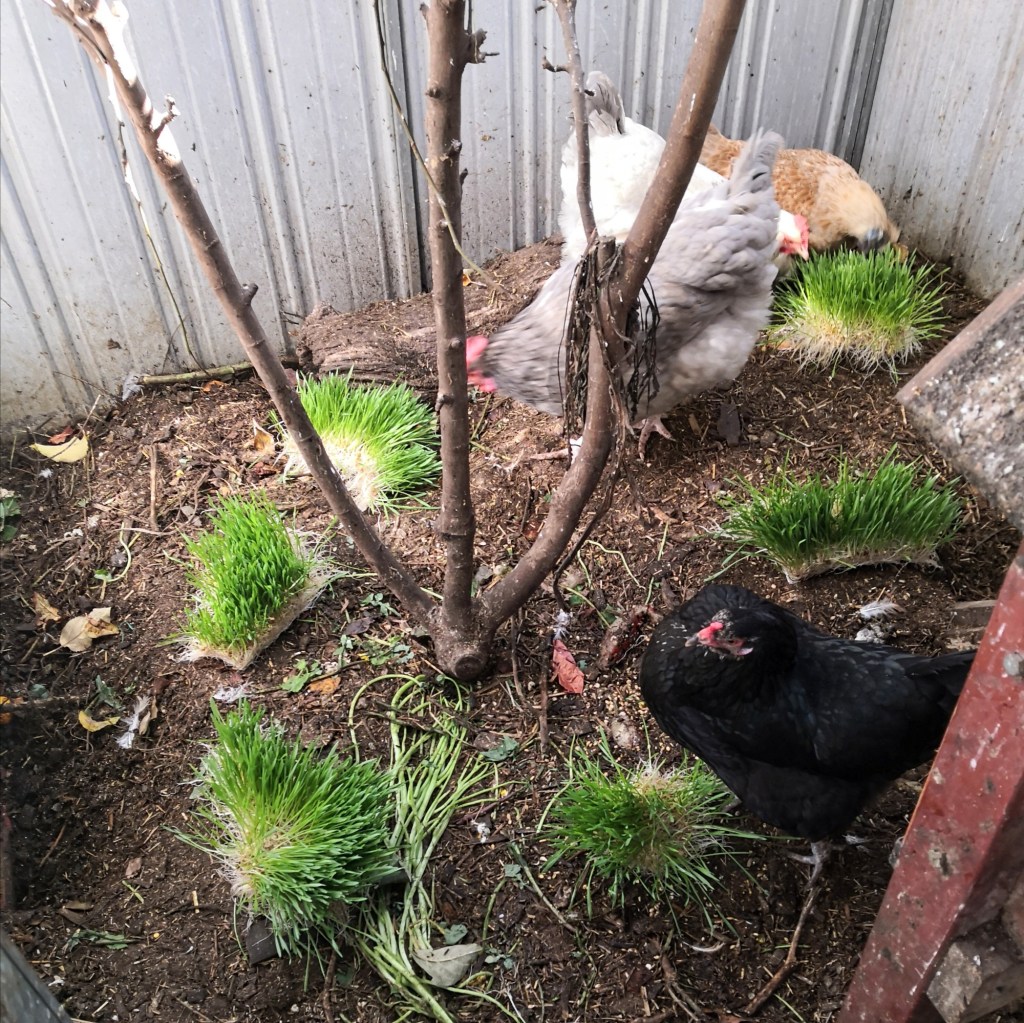
me to break it up so they all get their own chunk!
Why are seeds so good?
Grains and seeds are little spaceships, protecting the embryo and containing everything needed for it to start a new life – that’s why they’re so nutritious. However, some seeds, such as most Legumes, have what is called an ‘anti-nutritive factor’ which, as the name suggests, prevents animals from getting the full benefit from the seed when they eat it. This anti-nutritive compound is named ‘Phytic Acid’ and actually impairs the absorption of iron, zinc, calcium and some other minerals into the body of the animal eating it. Cooking, sprouting, fermenting or turning your chicken’s grain into green fodder reduces the amount of Phytic Acid in the seeds. It’s a way the plants have evolved to discourage animals from eating their seeds. Better to let Nature do her thing.
When you a seed germinates, its contents change drastically as the processes that held its life in stasis change to those that stimulate growth. There are many enzymes that start converting chemicals to those needed for growth and in doing so, improve the nutritive content for whoever is going to eat them – and that’s us and our chooks!
Even though they start in the same way and from the same seeds, fodder and sprouts are different. Sprouts are the very early stage when the first root (called a radicle) and the cotleydons emerge. Cotleydons look like tiny leaves but they’re not true leaves, they come after. Botanists use the number of leaves emerging from a seed to to classify the plant into one of two divisions. One cotleydon means it is a grass (monocotleydons), two mean its in the other camp, dicotleydons. It’s not necessary to know this to sprout seeds or grow fodder, but it’s kind of interesting.
Microgreens are an intermediate stage between sprouts and fodder and are probably the most nutritious stage for we humans but we want a bit more bulk in the organic material to fill the stomachs of our chooks so we let the plants grow until after the first true leaves form and the roots are pretty well established. This green, leafy stage is the best for animal feed as it contains a mix of everything and the plants are young and palatable.
Our DIY fodder system
We use a simple system to grow fodder for the girls. I watched at a few videos online and blended together what I thought would work, then made a few small changes to suit the situation here at Ligaya Garden. We get new crop every two weeks now in Winter. Hopefully, ity will be faster in Summer. For our fodder crops, we use a Wheat and Barley mix, Lipins and Field Peas, with Sunflower seeds as the occasional treat. That seems to keep the chickens happy while providing them with a bit of variety. We tried Corn before, but they didn’t like it. Only spend your money on what they will eat, if your girls love Corn or anything else, then definitely grow that.
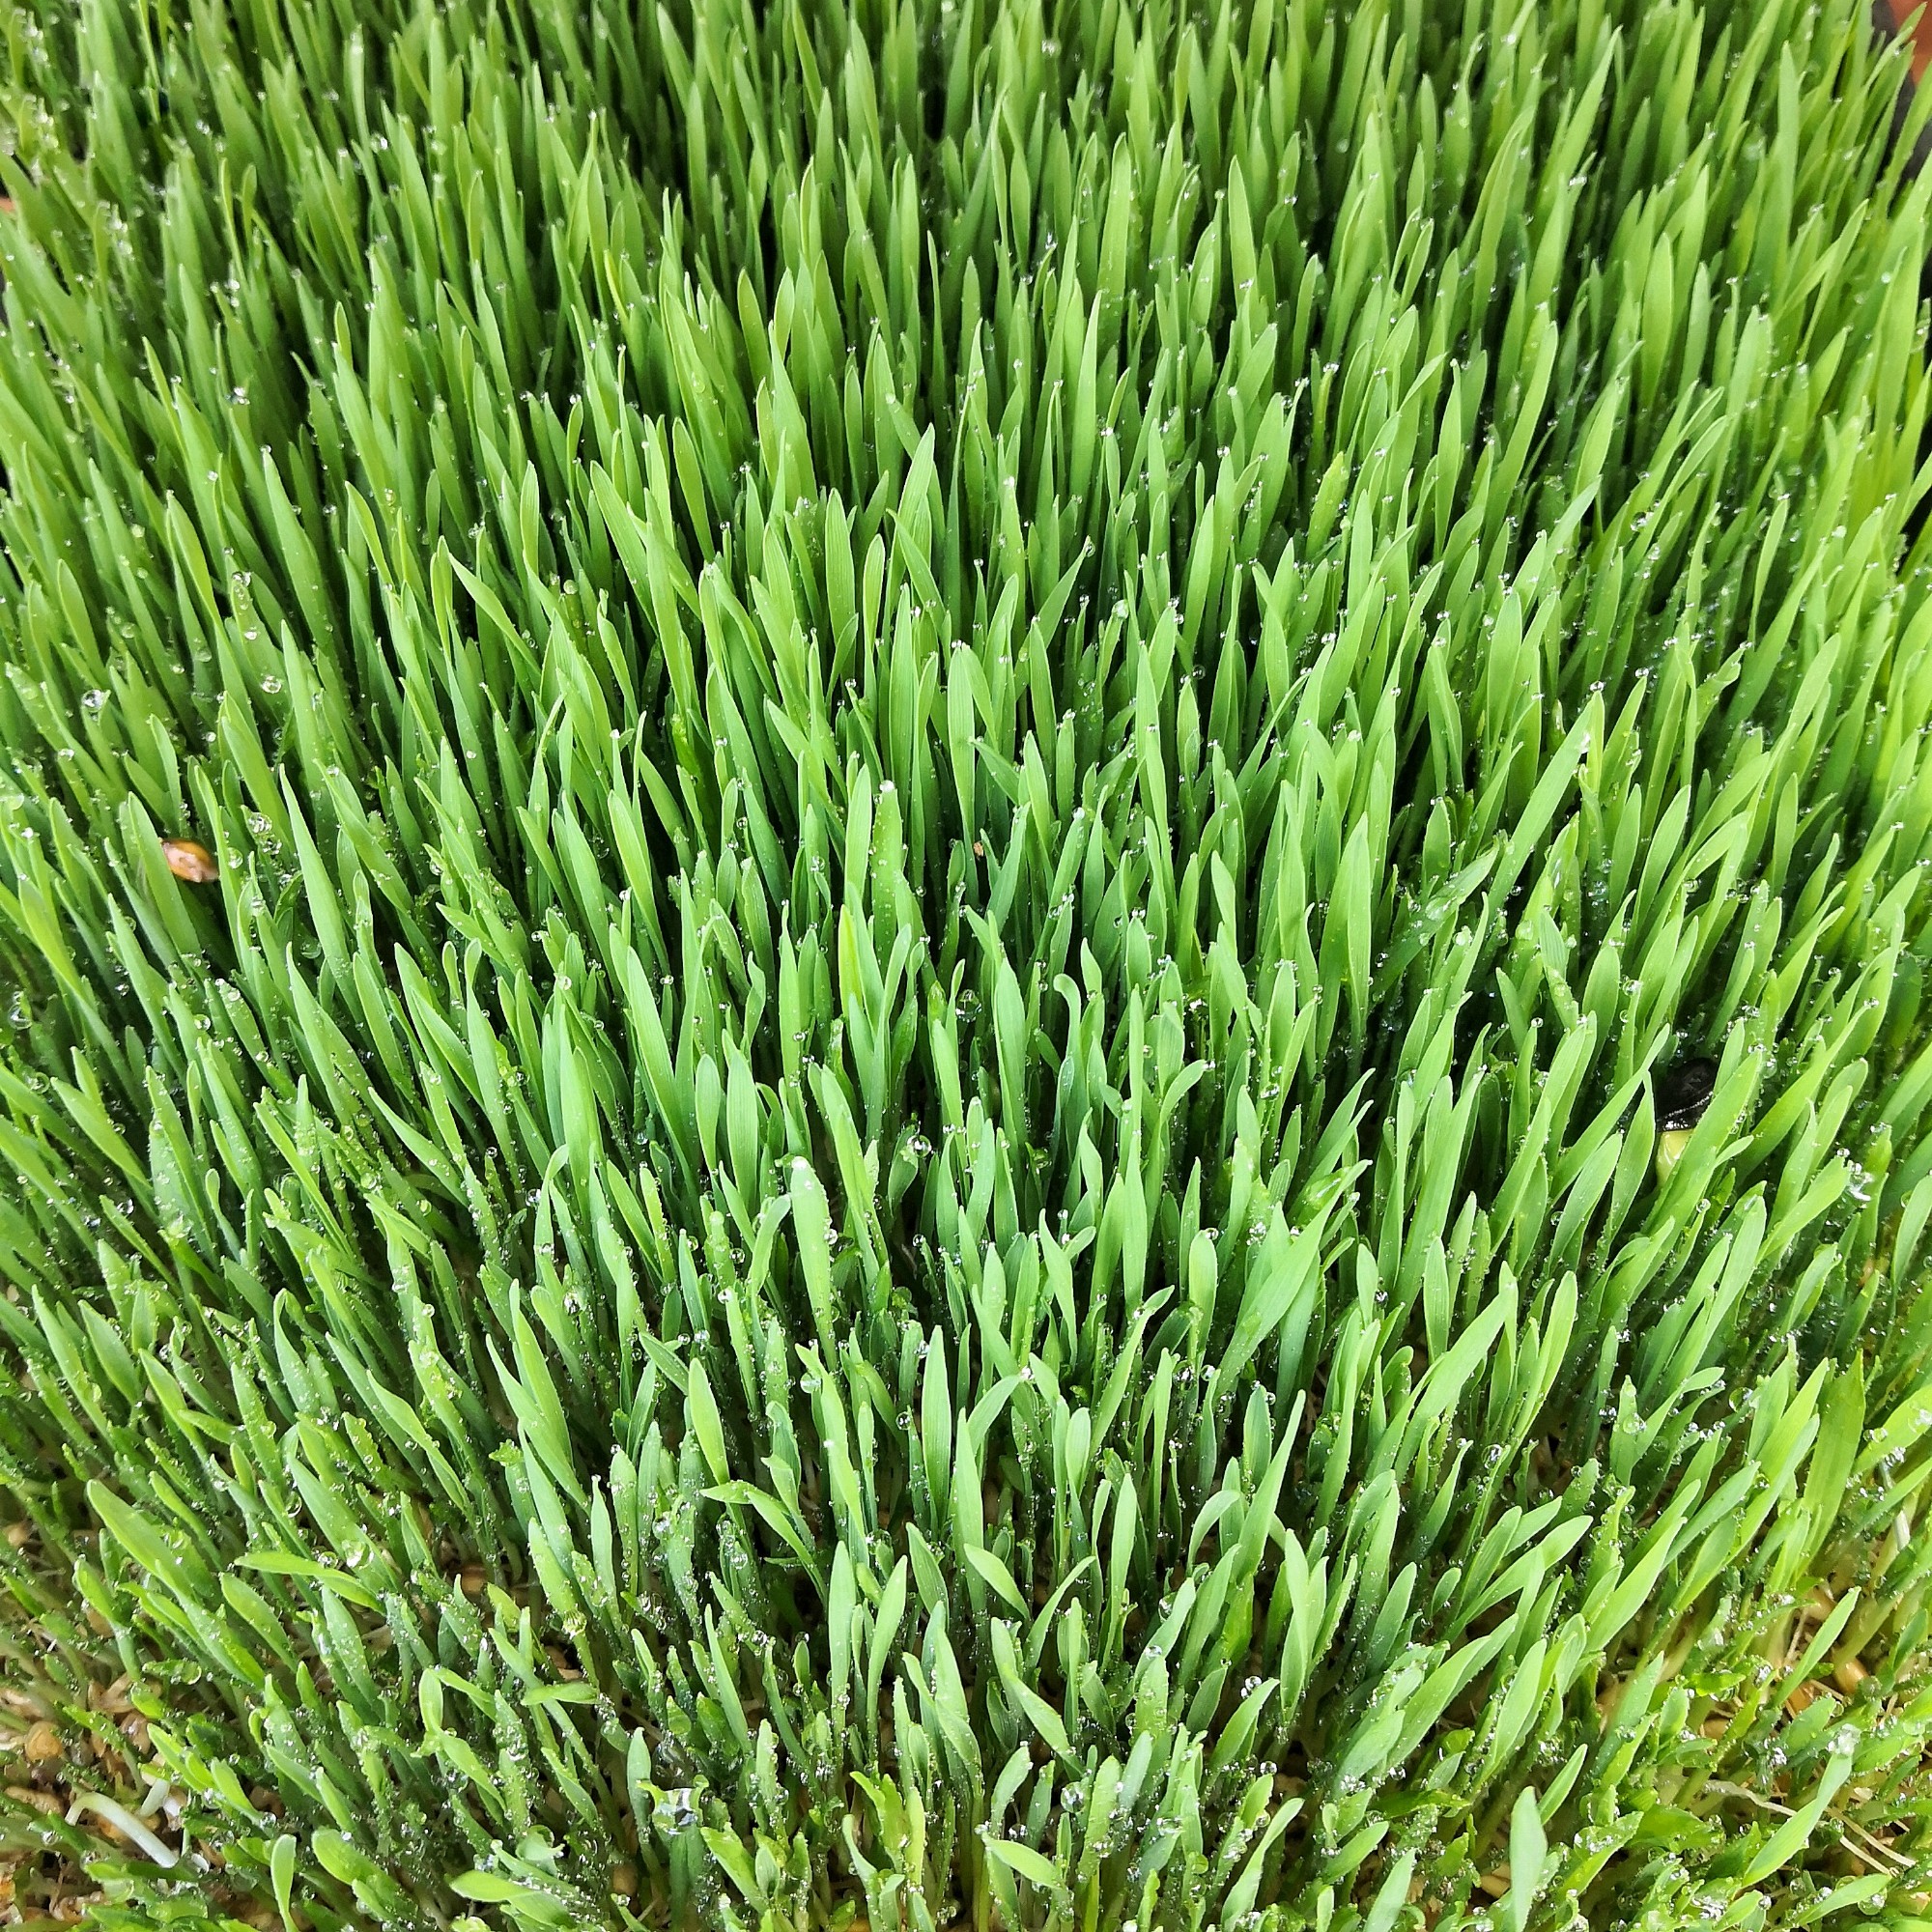
Wheat & Barley almost ready to go. 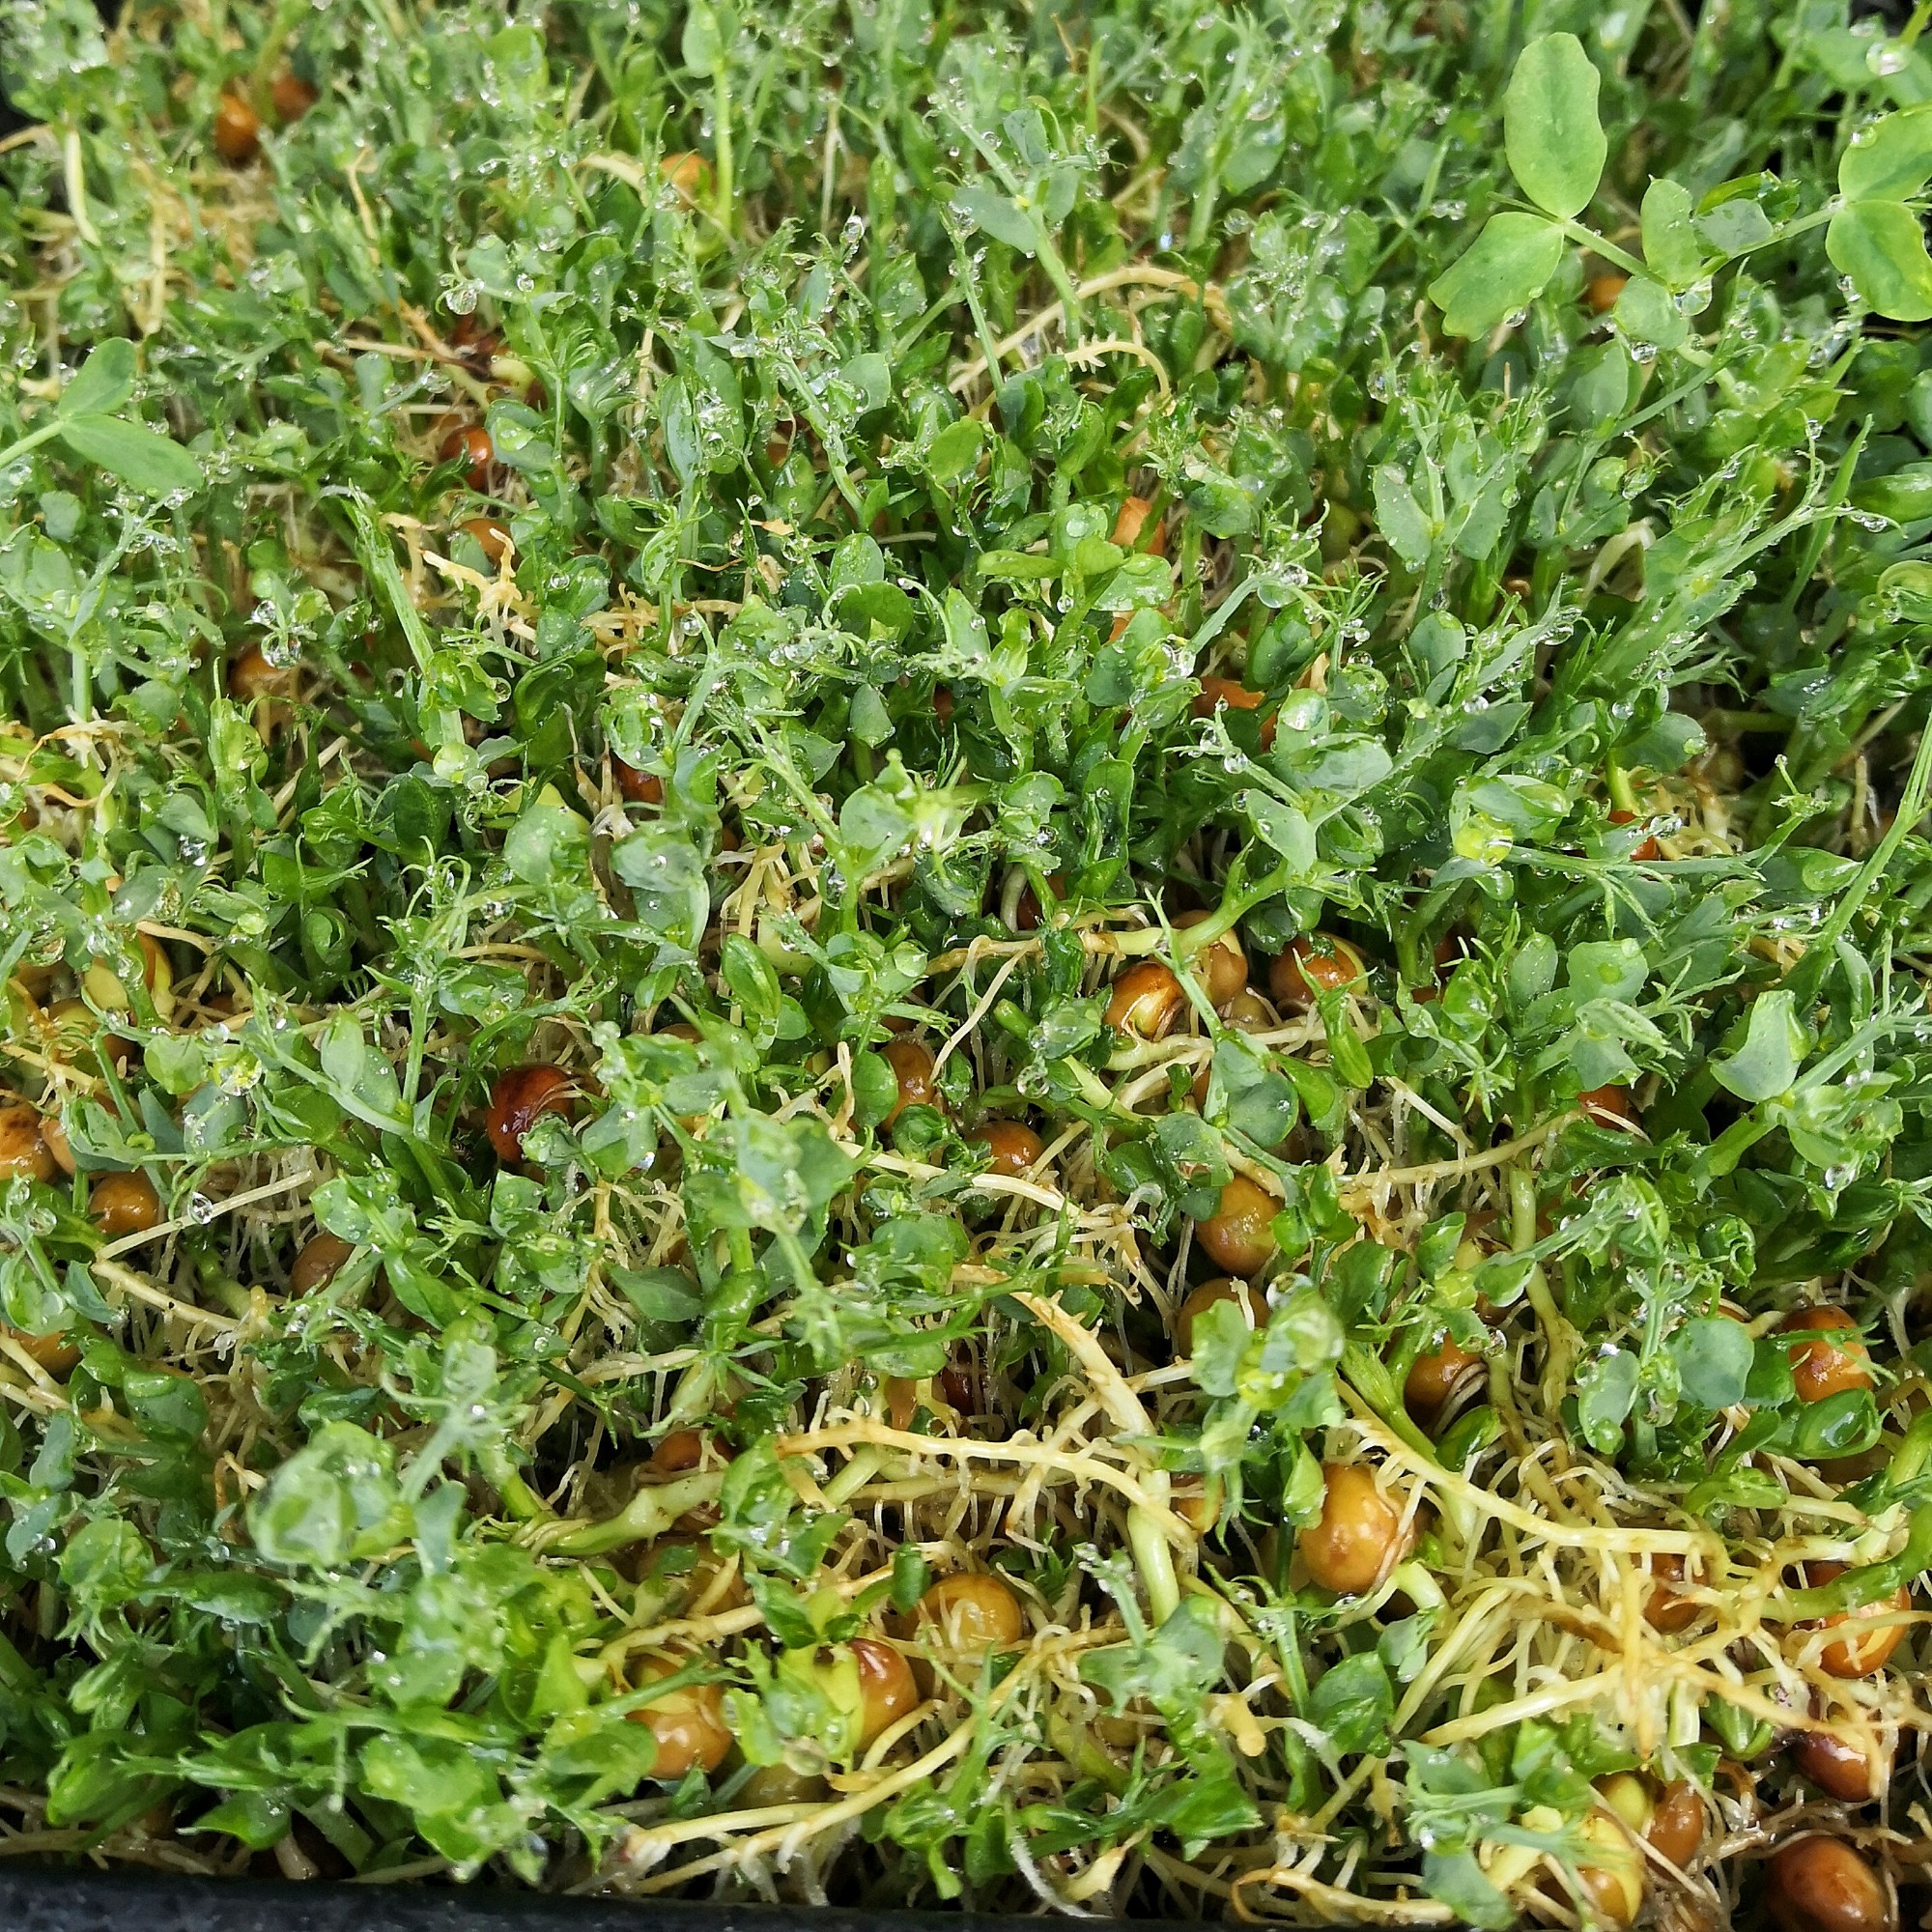
Field Peas 
Sunflowers
We buy the Wheat and Barley in 30kg bags (at about $18 a bag, it compares well to $40-ish if we buy it a kilo or two at a time). I’ve got the cycle of those down and can afford to get a lot at once. The others, I’m still experimenting with a little so still buy in smaller quantities.
A dedicated greenhouse for year-round fodder
We found that growing in a small greenhouse is best. I made a little greenhouse out of bits and pieces but any of those cheap, small greenhouses from your garden centre will do the job. Whether you need 3 or 4 tiers will depend on the amount and variety you want to produce. Each tier holds two trays, so four tiers do us nicely for our cycle now that we have a system going.

Watering
We use 360° misters as sprays, two per tier. The top and bottom tiers have misters that can be shut off because those are the two tiers where the most variation occurs. The middle two tiers have non-adjustable misters because, being in the middle of the process, they always need the same conditions. You can use whatever you need, as long as whole trays can get watered evenly. You may choose to water by hand or even put an inline tap on each tier for extra customisation of the water flow. I’ve found that to be unnecessary with the adjustable misters.

At the moment, it being Winter, I’m spraying twice a day. Summer will, of course, be different. Last Summer I found that spraying 4 times a day was necessary. Spraying also has one other advantage – it scares the mice!
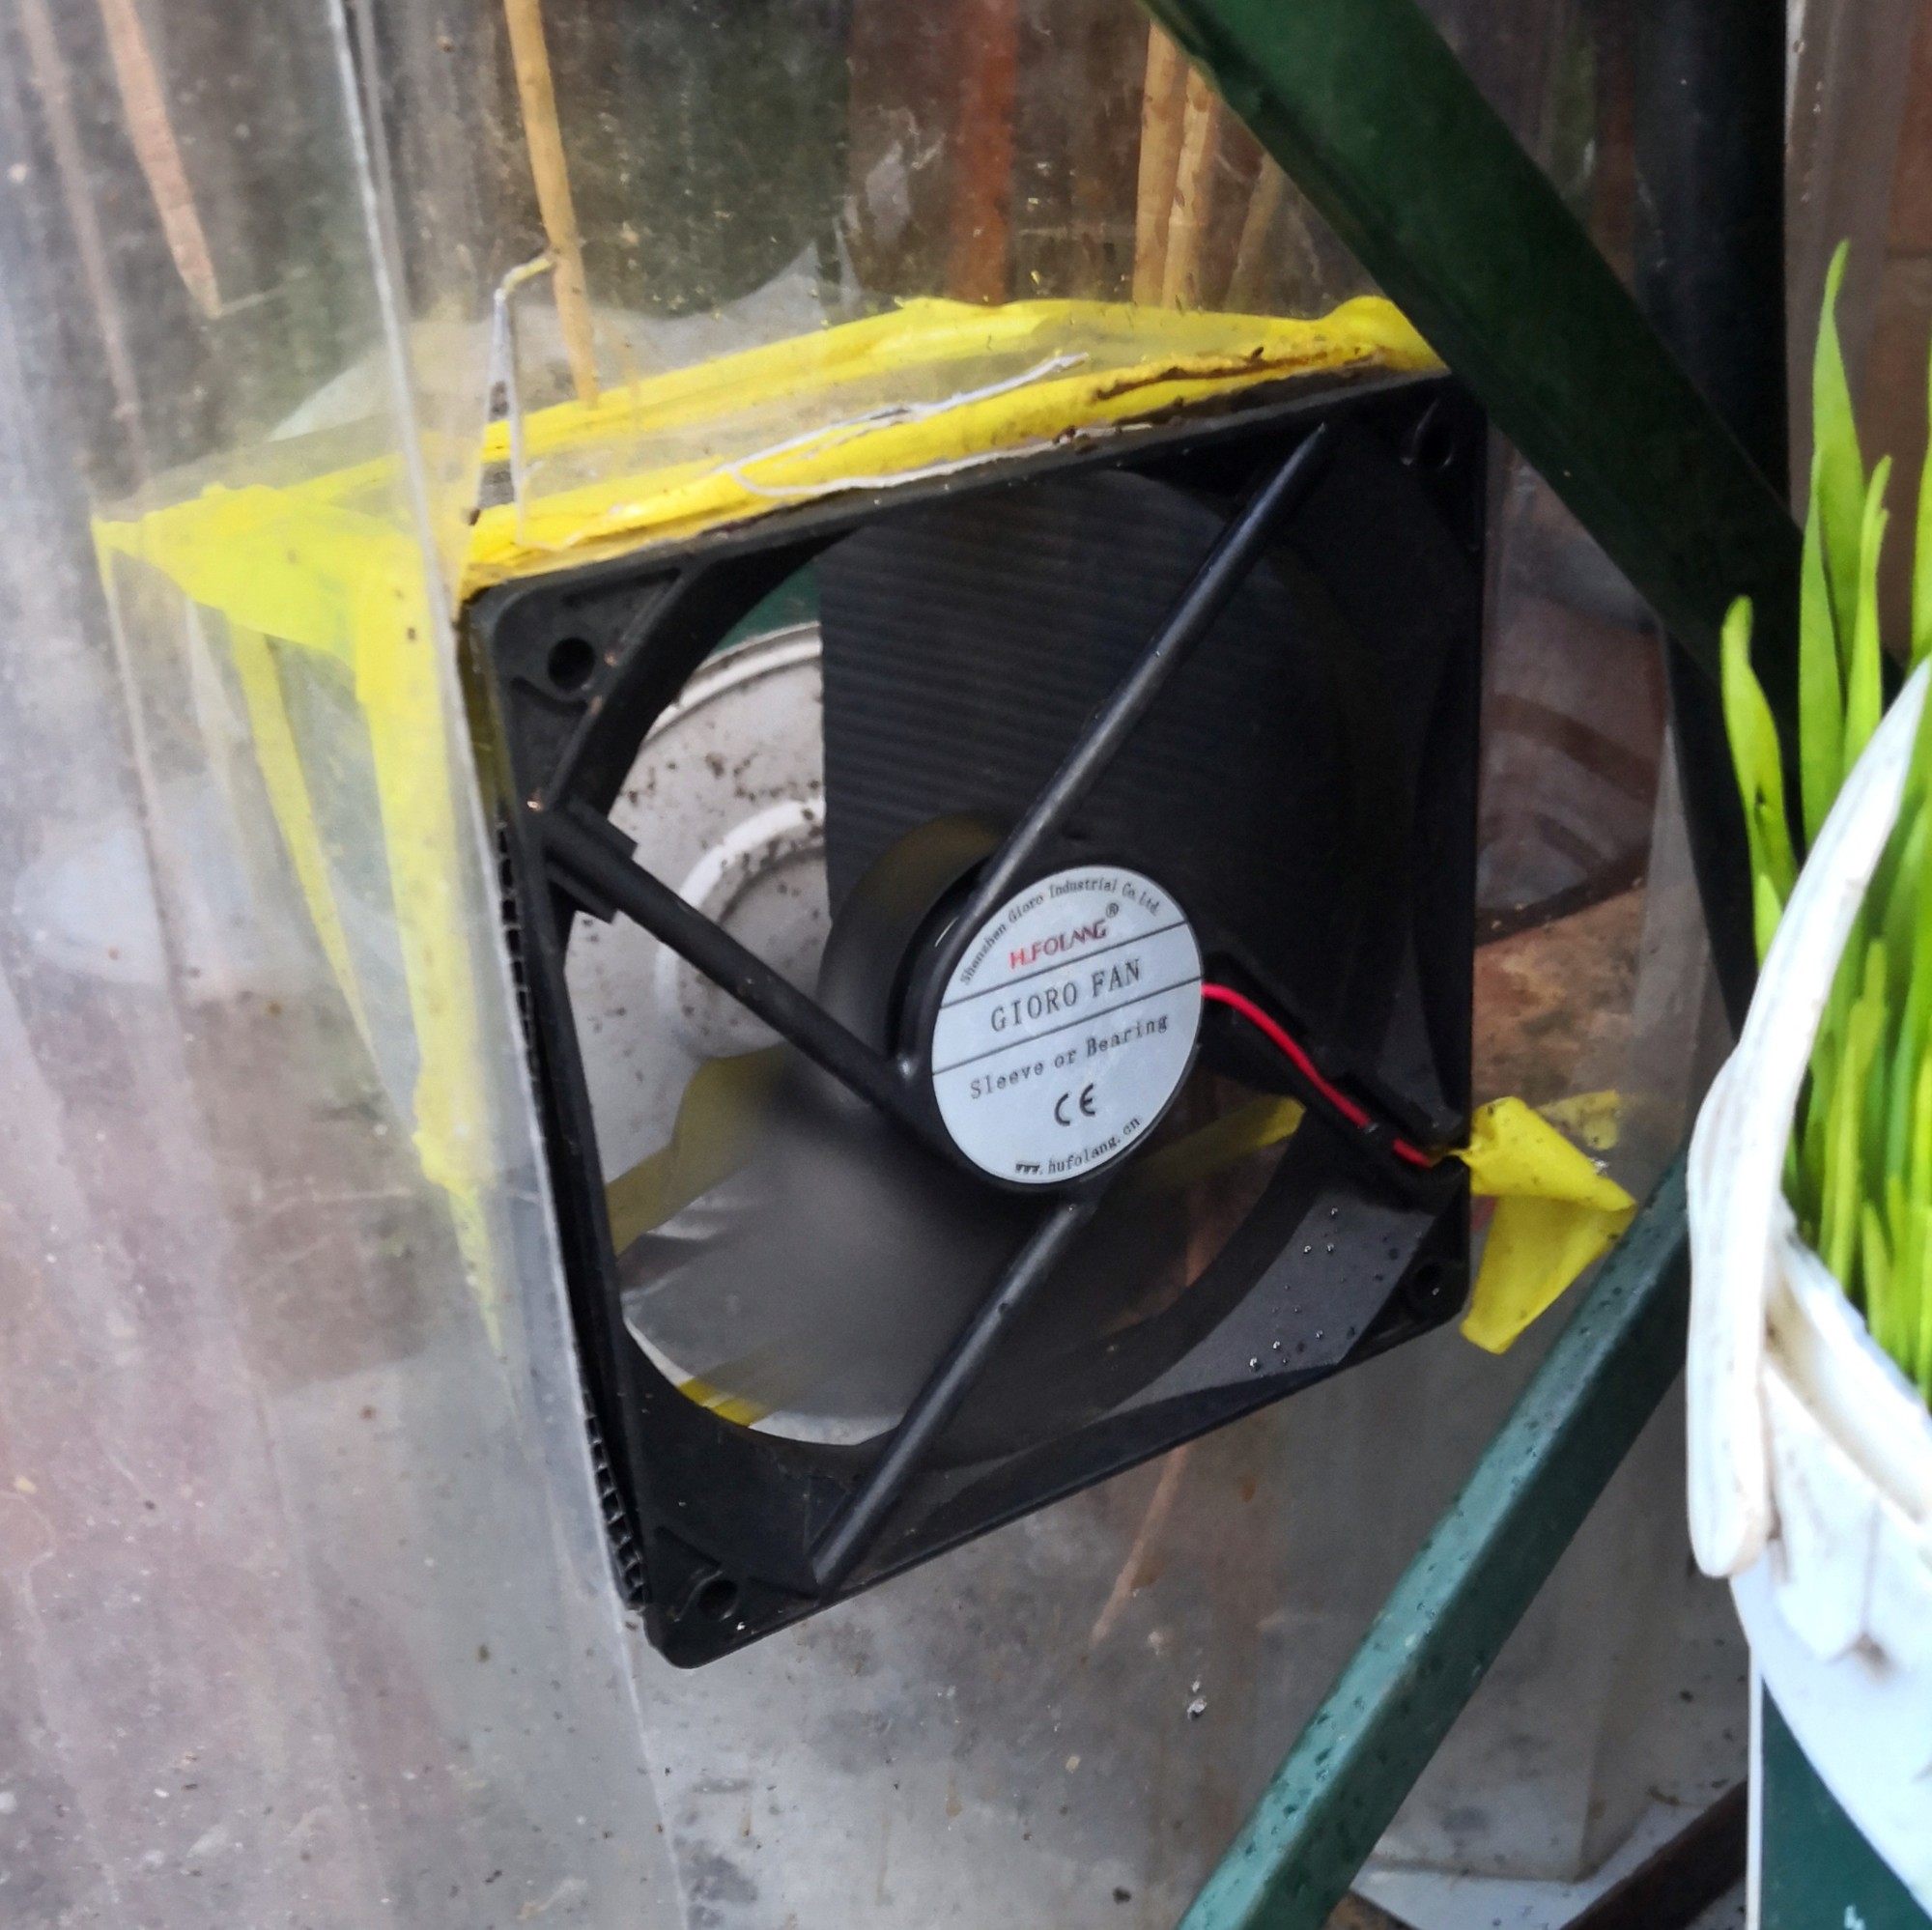
Airflow
In early experiments, I had problems with mold growing on the trays, especially on the Peas, even after using bleach frequently. I solved this by adding a fan near the bottom of the greenhouse. That’s attached to a small solar panel and blows all day while the Sun is shining. That has proven to be enough to remove the extra humidity that was encouraging mold growth. It’s only a recycled 12v computer fan but it moves the air around and out of the greenhouse nicely (plus it was free)!

The process of growing fodder is quite simple but two stages are quite critical and experience will show you exactly what to do. If you follow the steps discussed below, you should do alright.
Our process
Preparing the seeds
Washing and soaking the seeds is the first step. Wash the seeds to remove dust and contaminants, possibly including poisons. With Wheat, Barley and Sunflower, it is important to wash away most of the chaff. To do this, simply put the seeds into a bucket of water and stir a bit. Most of the chaff will float to the surface where you can skim it off.
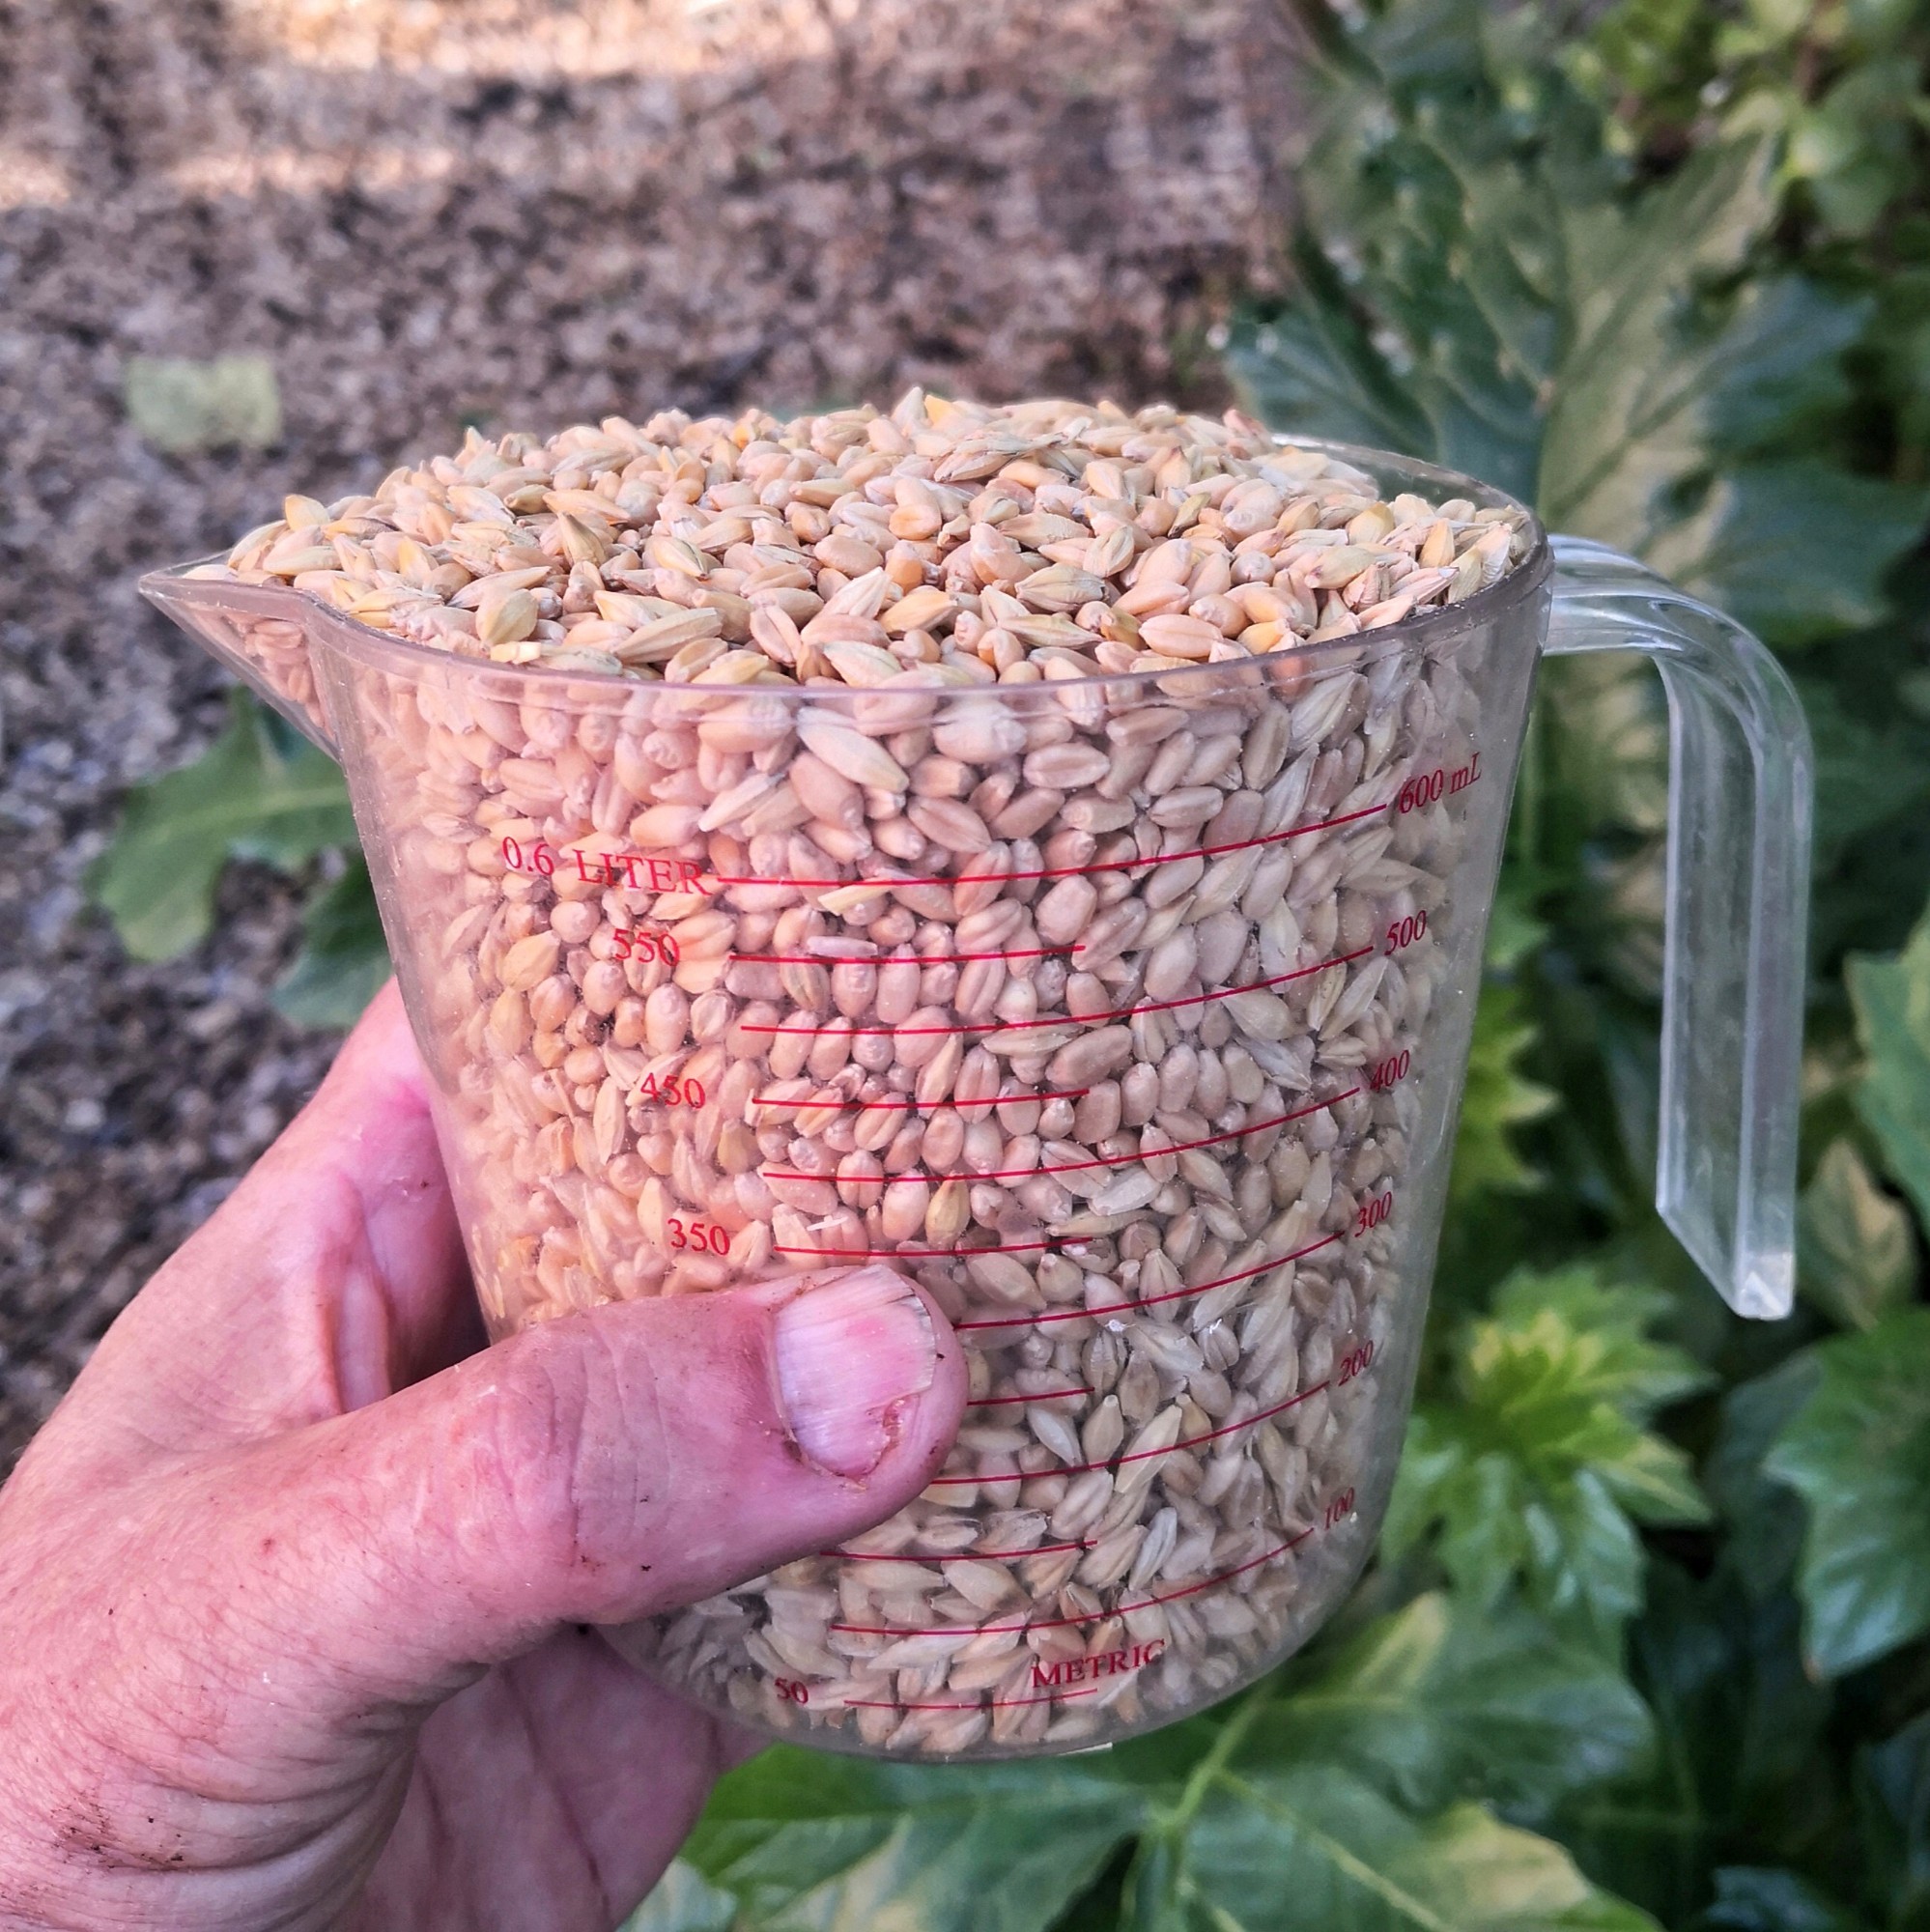
The seeds will swell during soaking, so you may not need as much as you think. Two and a half cups of wheat it Barley is enough to fill two trays once germinated. For the Peas and Sunflowers, I use one cup per desired tray.

This is the size bucket we use. 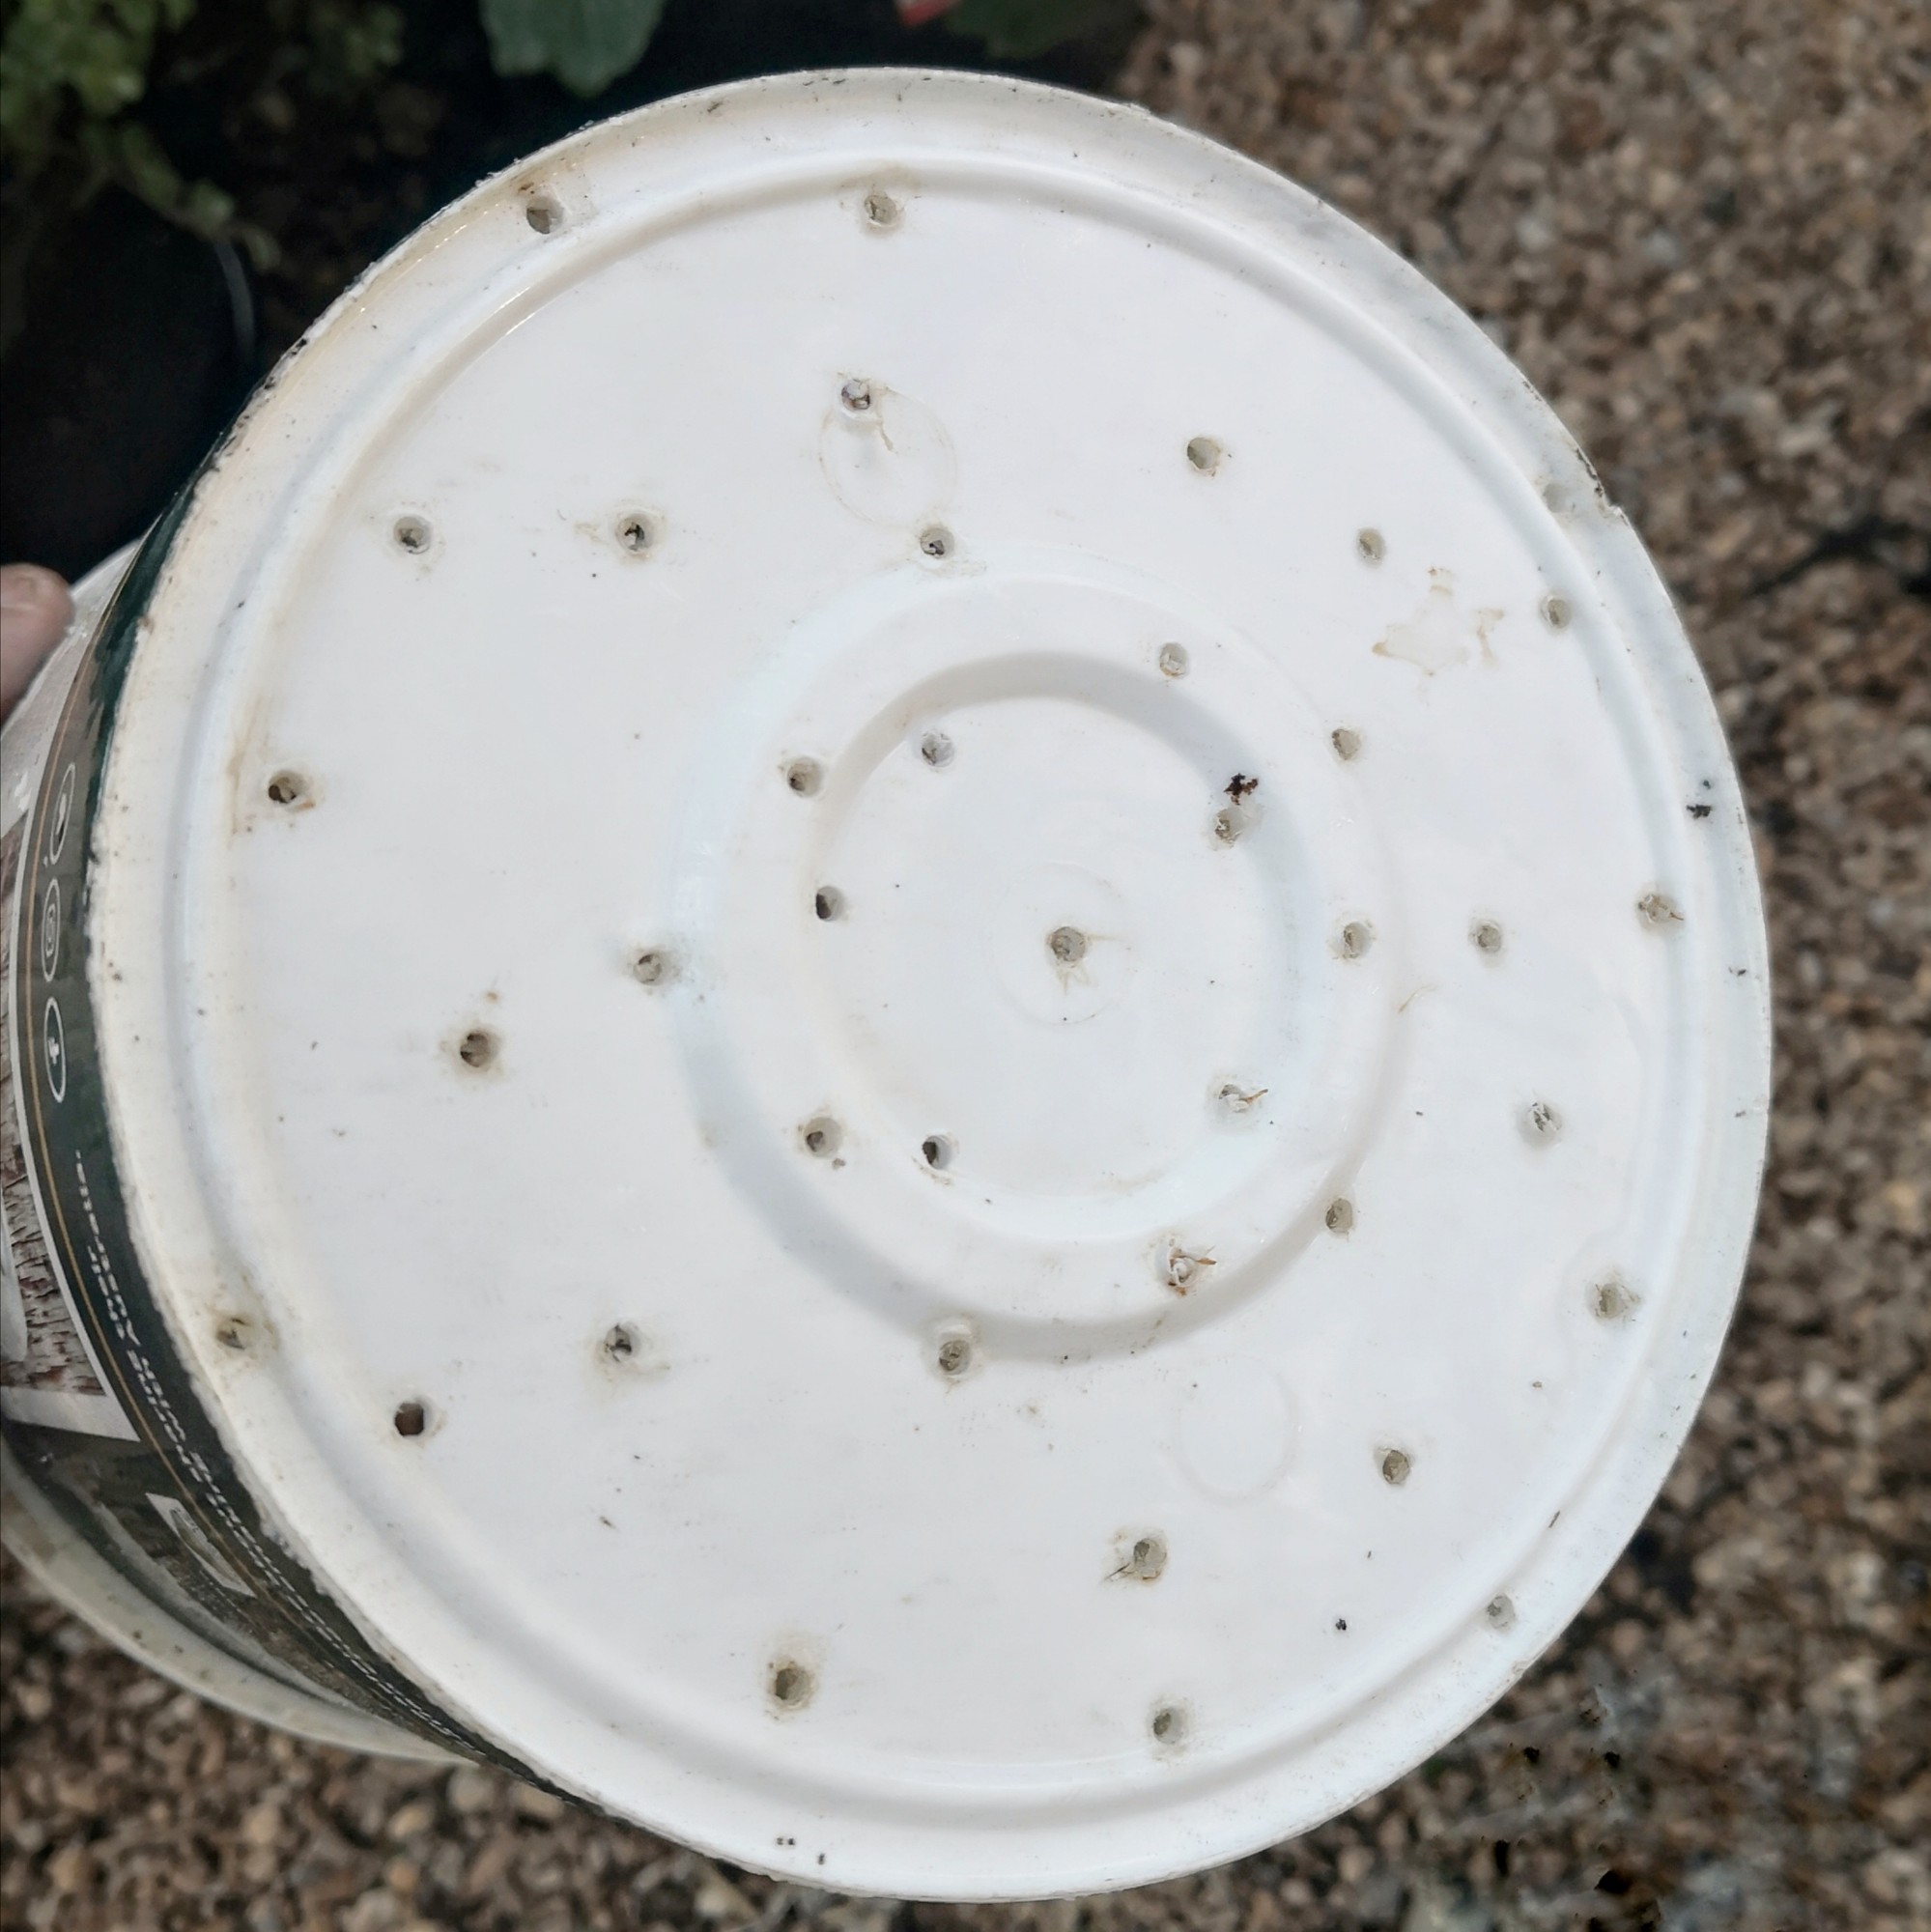
Holes are drilled into one 
which sits inside one without holes.
Pour away the first lot of water and add enough to your container to cover the seeds. For Wheat and Barley, you will need about twice the volume of water as there is in seeds as they absorb a lot. For Sunflowers and Peas, just make sure they’re well covered.
I created a little double bucket system in which the top bucket holds the grain and sits in the bottom. I simply fill until the top bucket is nearly full, put the lid on and leave it overnight. When the time comes to drain and rinse the grain, I simply remove the top bucket from the bottom and let gravity do its thing. You don’t have to do this, a bucket and a sieve will do the job but I had so many of these little hummus and yoghurt buckets around and no sieve handy…

To this new water, add a little bleach – just a teaspoon per litre is enough. This will help to kill off any mold spores on the seeds and help stop it growing later. To be honest, our chooks don’t care about a bit of mold but its presence will negatively affect the young growing plants. I find it unaesthetic too.
Let the seeds soak overnight in the water with bleach then, sometime over the next day, pour away that water and give the seeds a good rinse.
Place the rinsed grain or seeds in a sealed container to contain moisture and leave for the rest of the day. During the next day, give them another rinse with plain water.
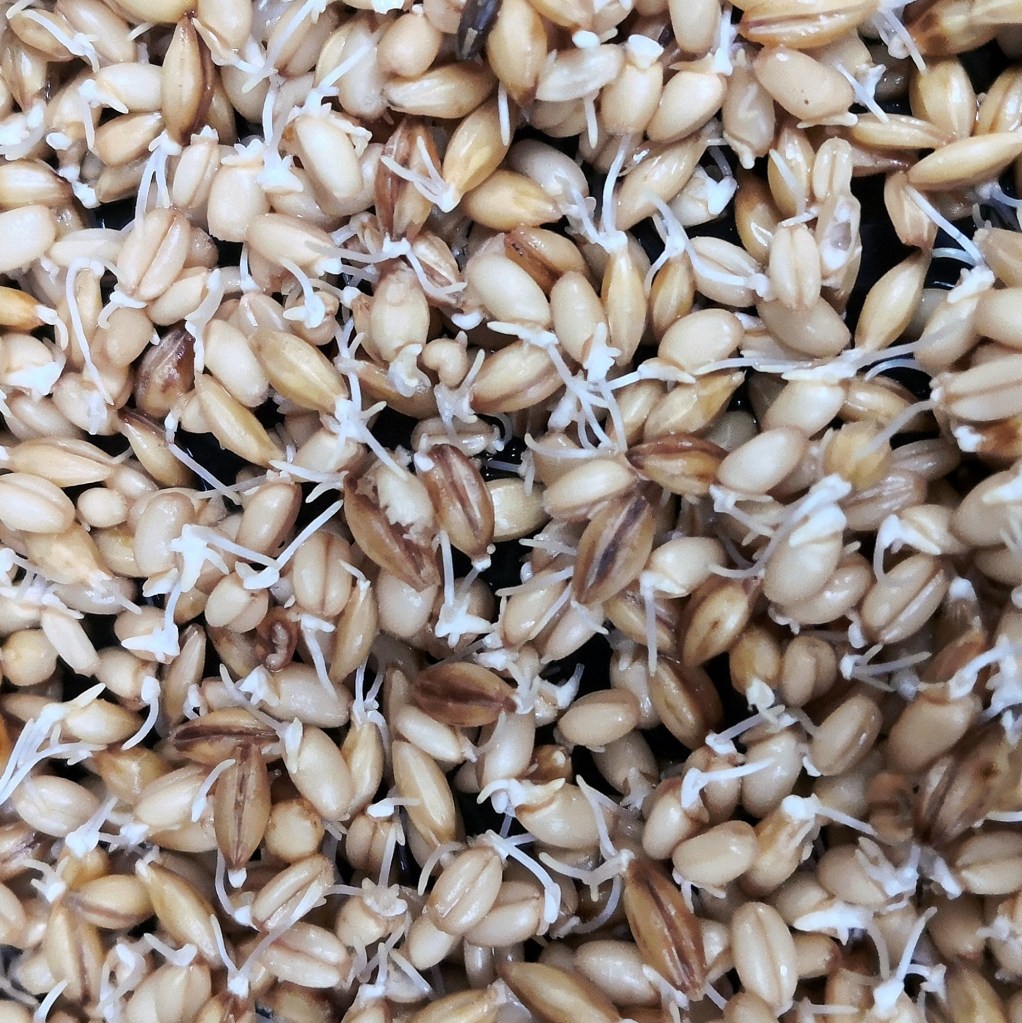
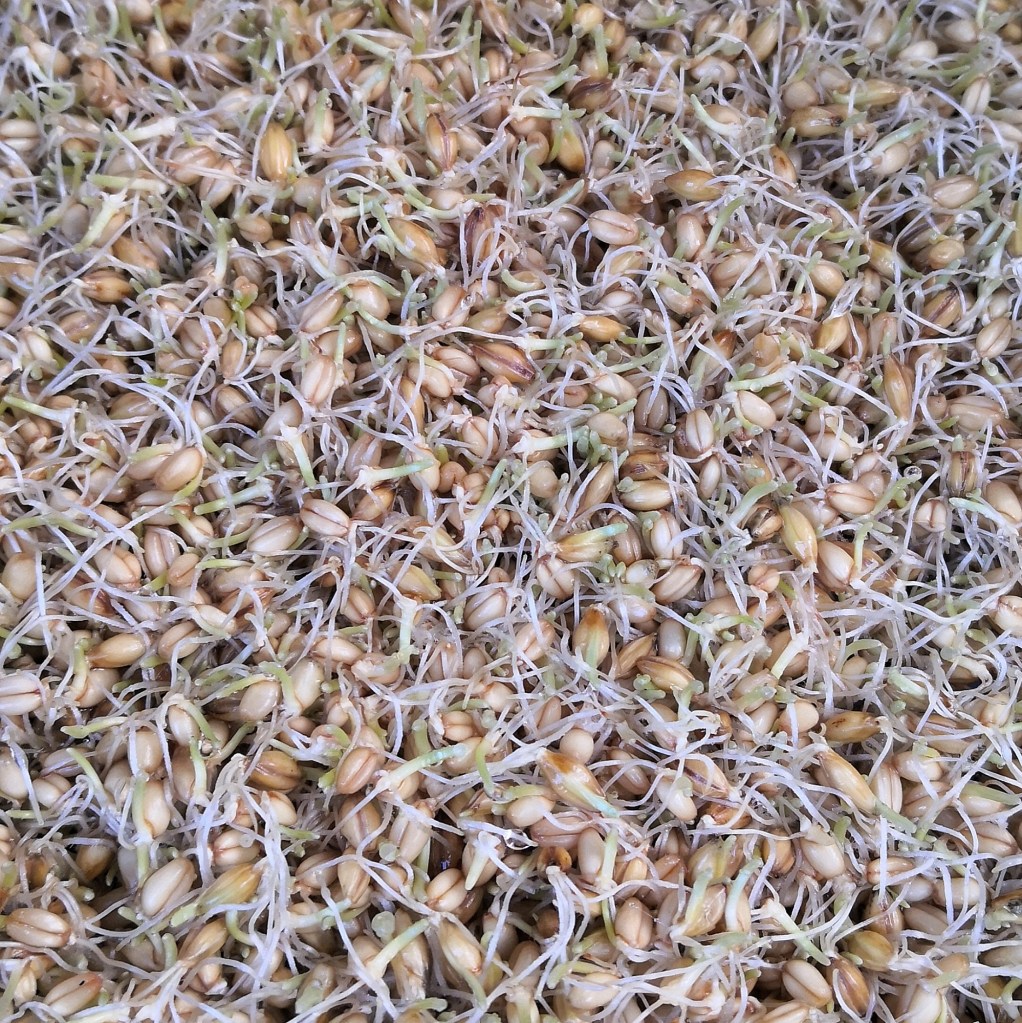
Depending on the seeds you used and the time of the year, when you look on the third or fourth day, you will see that the seeds have germinated. The first signs of the radicle will be poking out from the seed case. The seeds toward the bottom of your container will be slightly more developed than those at the top.
Rinse again and leave overnight. The next day, if you stir the seeds a little, you will see that true roots have formed. The day after the is the time to move them to the trays. If you leave them too long in the container, the roots will mat together and when you try to separate them, a lot will break. This won’t reduce your final yield by too much but the broken pieces can rot and cause problems later on. I’ve accidentally a container for so long that it was impossible to get the grain out safely because the roots had all matted together and grown through the holes at the base of the container.
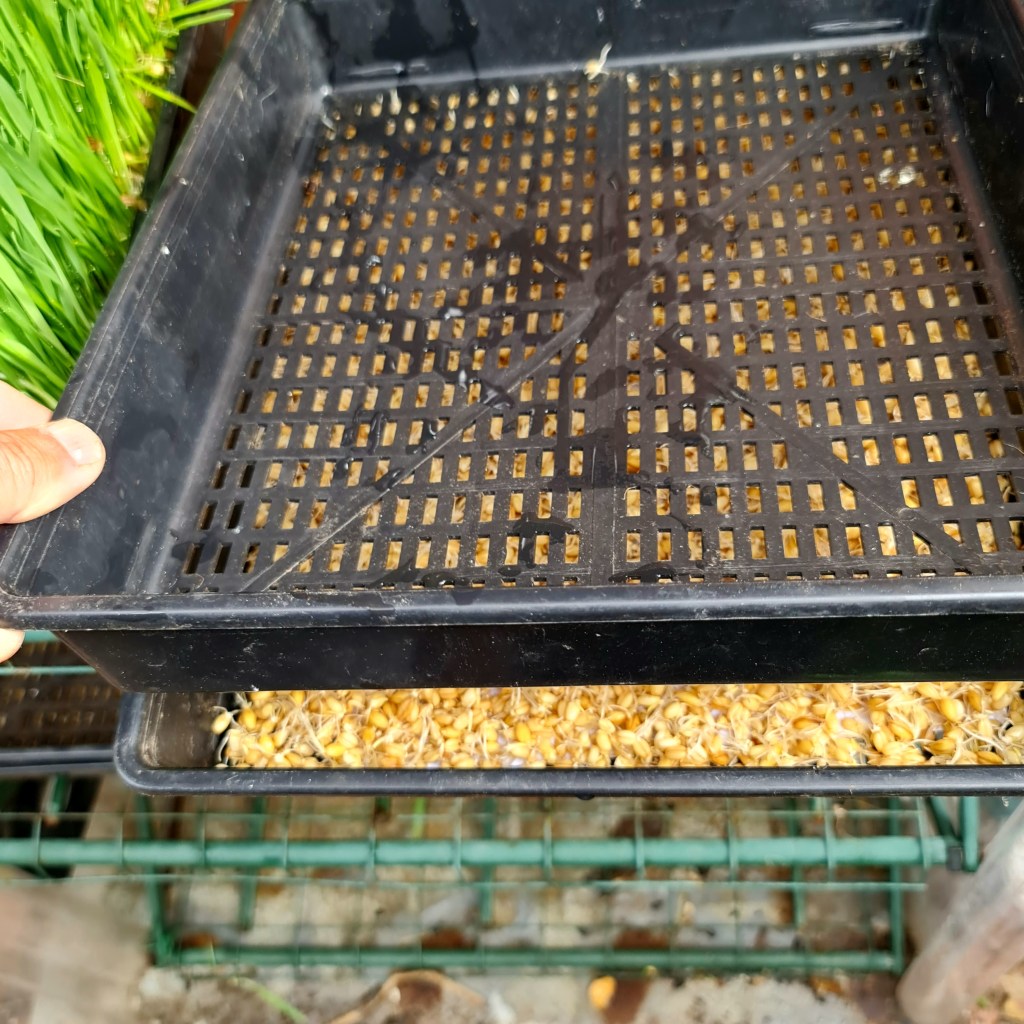
Moving from the buckets to trays
We use easily available 350 X 290 mm propagating trays, the kind with lots of holes in the bottom. Don’t use those without many holes, we need the water and air to circulate, not stick around because that leads to mold. Moving the seeds onto them once the first roots have formed means that there is enough bulk to stop them from falling through the holes in the trays (though there are always a couple that do so). Alternatively, you can place a sheet of paper (recycled, of course) in the bottom of the tray to stop seeds falling through. The roots will grow through this and break it up, so it won’t be a problem for the chickens.

Spread the germinated seeds evenly over the surface of the tray. Not too thickly because that will lead to too dense growth and that will retain water and reduce air flow. Just make sure that the entire tray is evenly covered. The roots will form a mat as they grow which will further prevent seeds from falling through the holes. If you get the thickness if the seeds right, you will eventually get a mat of fodder that you can easily peel out of the tray. Spreading the seeds too thinly on the tray will give you patchy growth and too thickly will give you a mat that will be more difficult to remove.
Wheat & Barley mix 
Sunflowers
Once the seeds are spread, give them a water with water and a little bleach. This will help protect them while they are getting started. We spray all of the trays with dute bleach whenever we introduce a new set of trays into the system. It’s just an extra precaution we take but is not absolutely neccesary. We do it because we use a mixed rotation that includes Peas which are prone to mold.
After this, give the trays a good misting or hand watering at least twice a day, making sure that all of the seeds are moistened. In hot weather, of course, more water is needed and I found that, during my experimentation, that 4 times a day was necessary.
Fertilising and Bleach
Once you have good root growth and substantial leaves, you can give the trays a light spray of dilute seaweed solution. This isn’t absolutely necessary as the plants are, mostly, still living off of the nutrients contained in the seeds and a bit of sunlight.
We do a light spray every couple of days, just to boost the health of the plants and hopefully give them a little extra nutrition that they’ll pass on to the chooks. That’s why we use a booster such as seaweed extract rather than a full on fertilizer. I mist it so that some of the nutrients can be absorbed by the leaves.
Because the system is watered from the top down, any unused fertiliser will be washed away, so if you introduce a fertiliser to the system, you will need to mist it on at least every two days.
After the initial soaking stage, bleach is only a precaution and is not absolutely necessary. In the warm weather the cycle can be completed quickly enough to prevent mold from growing, as long as the ventilation and drainage in the system is good.
Sunlight

When your soaking your seeds and while the seeds are germinating and sending out their radicle, they don’t need light. That’s why at this stage, you can stack the trays on top of each other. That helps contain the growth to a horizontal plane which will stop the seeds falling through the holes in the tray and help them to develop a good mat. You can also just place a single, empty tray to cover the germinating seeds until the shoots start to grow well, I usually remove the covering tray when there is just a touch of green on the new leaves.
Once the roots are established, move the trays into filtered sunlight to encourage them to begin to photosynthese. The newly formed shoots will turn green and start providing energy for the plant.
After this, all you will need to do is to keep the water coming until the plants have grown to a height that you are happy with. If you follow these steps, you’ll end up with a beautiful may of fodder like the one in the pics below.


Possible problems
There are a couple of possible problems that you may run into when growing fodder in this way. They are –
- Mold – if you keep things too wet or even have contaminated grain, you will get mold forming, usually white mold. This is harmless for the chooks but is unsightly and will lead to the rapid decay of the growing fodder. Excellent drainage and good airflow are essential to prevent mold, as is the addition of bleach to the initial soaking water. If you get mould, give the mouldy grain to the chooks and start another batch. Cleaning of containers and trays with bleach once they’ve been used is another good way to reduce the chances of mold forming. Keep your greenhouse clean also. I give mine a spray with diluted bleach whenever I’m finishing a batch of fodder and occasionally will take everything out, give it a spray and leave the door open to allow it all to dry out.
- Smell – if you find that your grain has become smelly, you have left it for too long. It can begin to ferment and even attract those little black flies. If this has happened, discard the batch and give it to the chooks (chooks never lose when it comes to food)! Start again.
- Browning – there can be two causes of browning – wither the sprouts have rotted by being left for too long or, they have dried out. DIscard and feed to the girls, start again.
- Browning of the root mat – if you let the root mat dry out, it will turn brown. Alternatively, if you leave the mat in the tray for too long, the roots will start to die off and turn brown. Discard and feed to your chooks and start again.
- Pests – slugs love the moist conditions and the tender, fresh food and mice are notorious lovers of grain. Sealing up any gaps in the greenhouse will help, as will traps. If you use baits, make sure they’re kept away from the grain. Mice will actually get in and pull the little seedlings up through a protective tray placed on top of them. Adding the occasional night time burst of spray also deters them a bit.
- Drying out – this one is a no brainer – not enough water. However, it may be a case of timing rather than quantity. Its better to spray frequently and allow things to drain rather than giving the trays a huge water once a day. In Winter, I find twice a day is enough. In Summer, I may have to go to four times daily and even once a night in the very hot weather.
That covers all of the problems I’ve ever encountered. You will have to tweak your watering frequency and duration to suit your particular needs but once you’ve done that, you should be fine. If you run into any problems, feel free to contact me and we will see what we can figure out together.
